
Table of Contents
I ❤️ Berries
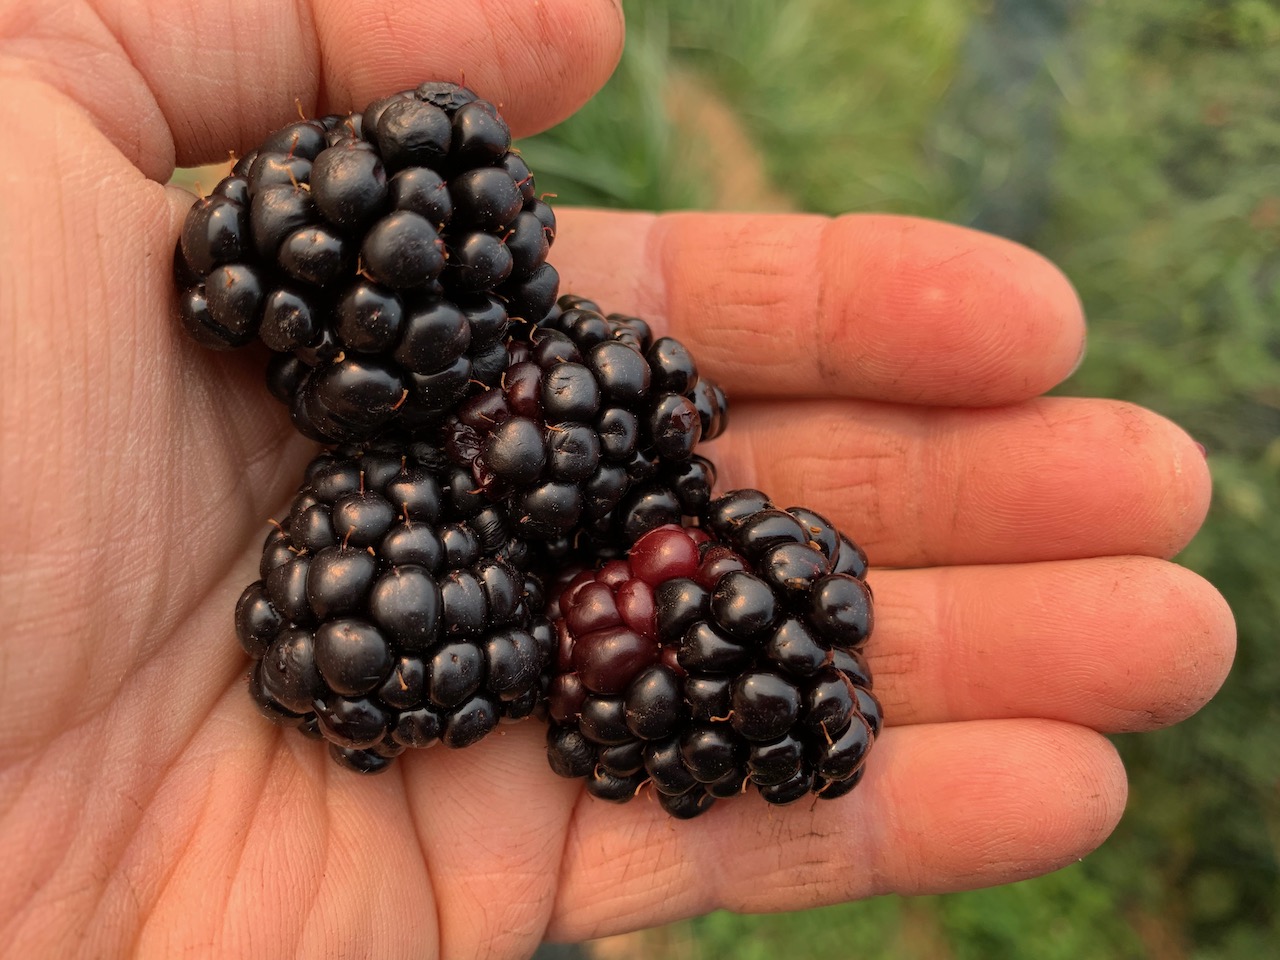
Table of Contents
July in the Garden: Bring On the Berries
On my farm I have about 120 row feet of cane berries, 20 feet each of 6 kinds of berries. Each July I am out picking every morning, doing my best not to waste any of these tiny, glorious flavor bombs. As I pick, I ruminate on perfect ripeness and subtle differences in harvesting each variety.
The first to come on are the red raspberries with their long harvest window. It is not just the duration of the harvest which is brilliant, but how long the raspberry is good on the vine. From the paler bright red to the darker wine red to the deep burgundy and the outer edge of edibility, the raspberry is the very best of what nature has to offer. Each small fruit pulls away easily from the sepals and receptacle, making a perfect elfin cap. The raspberries love to hide, so I creep along the row in a squat, looking up from below to find the hidden bounty.
Next, the black raspberries come in happy clusters of 6-8. As their harvest season begins, a sole berry from the bunch turns deep dusky red then nearly black with a faint bloom of silver dust around each drupelet. The flavor is at its fullest when the berry is truly black and the diminutive beanie caps pull away easily. They are seedy, but flavorful, and make great sauces and syrups.
The Tayberry is a lesser known berry with a short harvest window and an even shorter shelf life. A raspberry/blackberry hybrid, it has a nice tartness and faint rose notes. Tayberries start bright shiny red, then turn dusty magenta. At the end of their palatability window they loose their shine and turn to a deep mushy plum. Tayberries are tough to harvest, don’t pull away easily, and demand a sensitive touch or you end up with a bowl of prickly sepals, but are well worth this effort for something this rare and sublime for the tastebuds.
Next to ripen are Marionberries, a much loved blackberry variety. These long black shiny fruits are some of the easiest to harvest, though the vines are some of the thorniest.
Last to ripen are the thornless blackberries. I have two varieties, Triple Crown and Prime Ark, which are more or less the same in terms of size and flavor. They are the largest berries, with the longest harvest window of my once-fruiting canes, offering as much as 6-7 weeks of very berry joy. These giants can be as much as an inch and a half in length and and inch in diameter and when perfectly ripe offer the quintessential blackberry experience for your palate. Plus, did I mention thornless!?
Low Input, High Yield
Cane berries are an excellent addition to the homestead garden system. Once installed they yield for many years with a small amount of annual care; small input, large output, win-win-win! Cane berries are tolerant of many soil types and can even produce in partial shade and semi-drought conditions. Like many of our common fruit trees (apple, pear, cherry, peach) cane berries are in the rose family and can be botanically identified by flowers that sport 5 petals and multiple stamens. Once pollinated, the petals fall away and the drupelet with its collection of drupes begins to develop and ripen. Each drupe contains a single seed. Beloved by birds the seeds pass through their digestion and get pooped out where birds perch and thus berries spread themselves far and wide. Cane berries also spread vegetatively by rhizome, underground running roots that send up new canes. They can also take root wherever the tip of the cane or a leaf node touches moist soil. All of this gives cane berries the reputation for being a bit invasive, though the dreaded Himalayan Blackberry is far worse than most of the horticultural varieties. I dig up the suckers and sprouting tips each Spring and give them away–or sell them to enhance your homestead economics! You can also easily make more plants by cutting sections of cane and pushing them into moist soil with at least 2 leaf nodes under the surface, one above, keeping evenly watered until they form roots.
Installing Your Berries
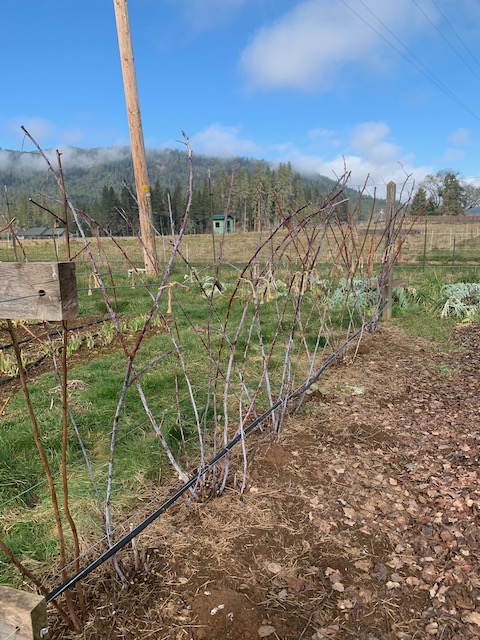
Cane berries do best with a little bit of structure to support them, so they stay more or less upright and don’t flop all over the place. If you are planting in rows a post at either end with crossbars and wire stretched between is a common design. The posts should be installed at an angle, stabilized with concrete or anchored with wires, so that the weight of the berries doesn’t collapse the posts inward. The ground where my berries are is quite soft so I have anchor wires. If planting multiple rows, they should be a minimum of 8 feet apart. Trust me. When I installed my patch, I thought 6 feet between rows would be plenty and ended up crawling through scratchy tunnels of canes to harvest. After a few years of this, I moved my center row to the outside, and now my rows are 12 feet apart. This actually works great! Along a fence you may get away with a couple T posts and wire stretched between.
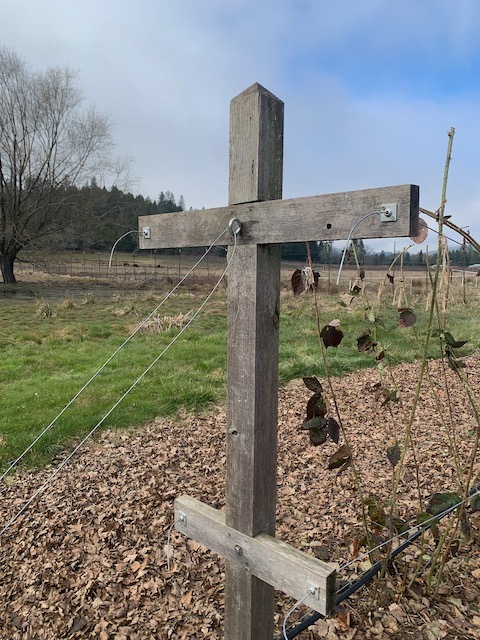
The anchor wire is looped in to a 36″ earth anchor to hold the trellis upright
Annual Pruning & Care
Prune and thin your cane berries in late Winter before they start to bud out. In the PNW I shoot for January/early February. In places where your temperatures are below freezing for many weeks/months, your canes will need to be thinned, laid down and heavily mulched in the Fall to survive.
With the exception of raspberries, most varieties fruit once on the canes that grew the previous year. Raspberries can be either once bearing or ever-bearing. Like the other cane berries, once bearing raspberries produce one time on the canes that grew the previous summer. Black and yellow raspberries are usually once bearing. Most commercially available red raspberries are everbearing, also called primocane. These fruit first on the canes that grew last year, then again on the canes that sprout this year making raspberries available for many months. Depending on your climate you could have a continuous supply of raspberries from May to October!
To tend the once bearing varieties, remove all the canes that grew two springs ago and fruited the past summer. They will either be already dead or looking pretty bad in comparison to the fresh new canes that grew this past summer. Then, for each crown select 2-6 of the sturdiest, straightest canes that grew the previous summer and remove the rest. Cut the canes you want to keep to shoulder or head height. Shorten any laterals (side branches) to 6-8 inches. I tie my canes to the wires with jute strings, because they otherwise get too heavy with the berries and fall over, making harvest difficult.
The process for the primocane berries is similar, Remove the canes that grew two Springs ago. These will have fruited twice now and will be obvious, as these canes are either dying or look scabby and old. After that the process is the same, pick 2-6 good-looking canes from each crown and top them at shoulder height. The only berries I don’t top in this manner are the Tay berries. They grow very long thin canes and these I wrap around the top wires, even overlapping several canes, for the best yield.
I top dress my berry rows with compost or well composted manure after pruning and mulch with straw or alfalfa. This provides plenty of nutrition, though if your soil is poor you may want to add bone meal, fish meal, alfalfa meal or an organic fertilizer.
Protecting Your Harvest
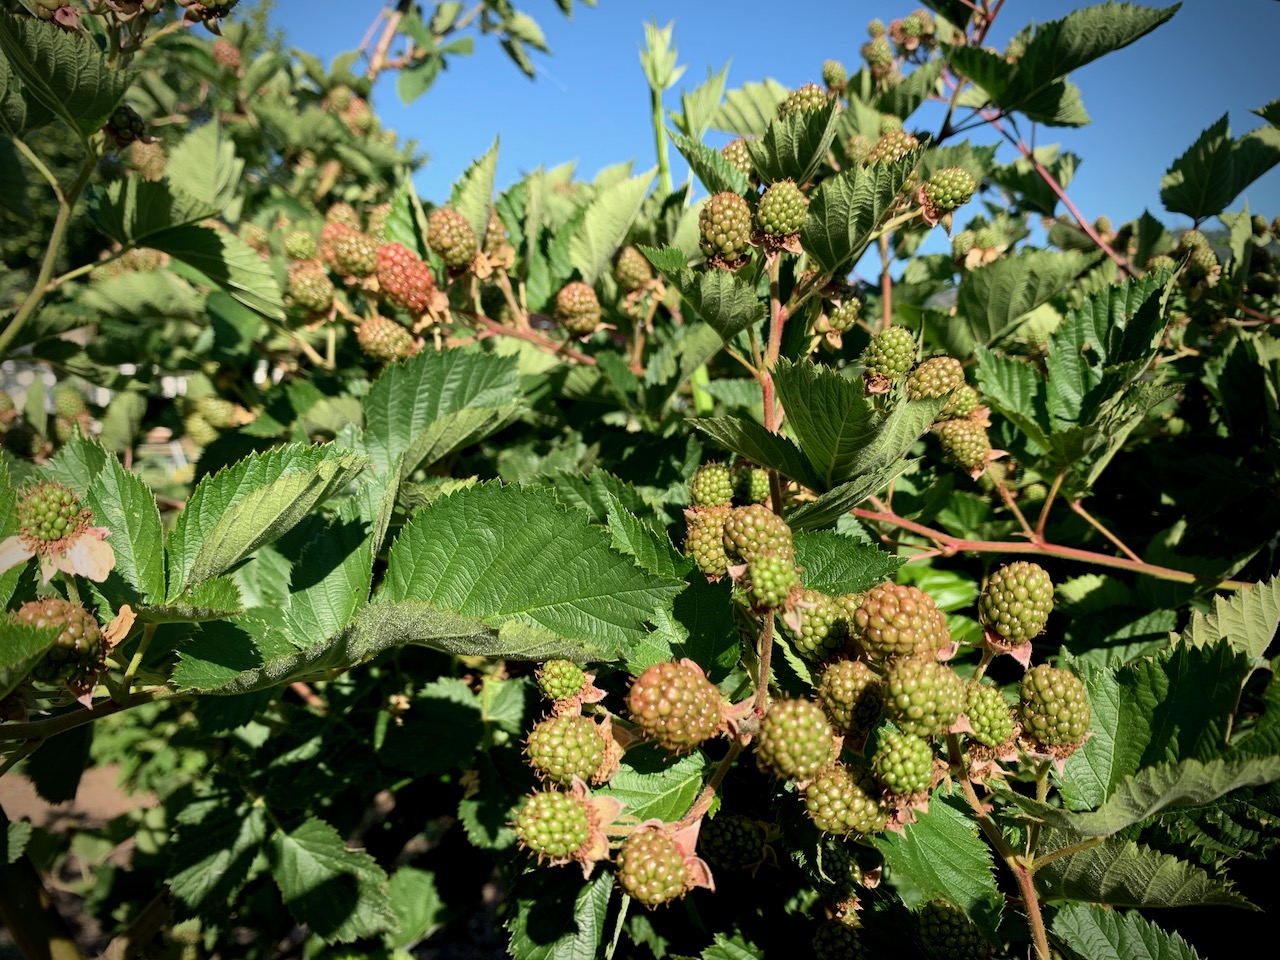
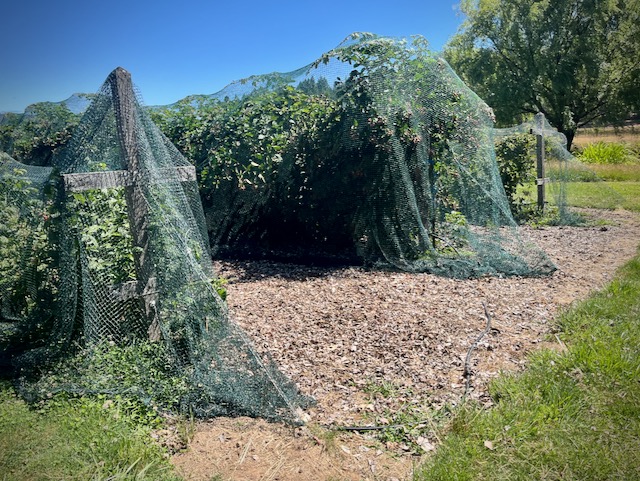
I adhere to the permaculture principal “fair share,” and don’t mind sharing my harvest with birds and other critters, but they don’t seem to have the same ethic as I do on this account, so my rows get a good quality net once the first berries start to ripen. Netting can tangle, get stuck on the berries and thorns and be generally annoying. I have had the best luck and least frustration with commercial grade netting. It costs a bit more, but is durable than the lighter weight stuff, bears installation and removal well and lasts through many years of use. Look for “Commercial Grade Heavy Duty Polyethylene Anti Bird Netting” and purchase an ample size that is at least 3-4 times as wide as your berries are tall.
5 responses to “I ❤️ Berries”

Thank you for your thorough reply. Truly appreciated.
The beetles that sap my berries (which look dry or deformed) are from the Largus family (largus californicus).
Since I don’t have many berry plants, I notice their impact.
However, considering this, I think I am also guilty of underwatering them, since I live in a hot climate (Zone 9) and also I watered daily, it may have not been enough for bearing fruit in hot weather.
What is the recommended watering for berries? And what are your thoughts regarding these beetles? Thank you for your time.
Ah yes. I see those guys a lot this time of year. They mostly feed on detritus (dead leaves and such) and are not considered a major pest, though apparently they do like strawberries. Unfortunately anything you would spray on them to kill or deter them would not be very appealing to eat either, so your options are hand picking, spraying off with water, or putting a large organza bag around the plant to exclude the bugs. Definitely if your strawberries are stressed due to lack of water, they will be more likely to be attacked. In terms of watering, if you live in a hot climate and you are hand watering, even every day, it might not be enough. I highly recommend drip irrigation and pulse watering, which just means setting the timer for frequent but short waterings, such as 5 minutes 2-3 times per day. Then the soil never fully dries out and doesn’t become hydro-phobic (water repelling) and you are still not using that much water if you are in a drought area. If hand watering is your only option, you can test if you are watering long enough by waiting 12 hours after watering then digging down into the soil to see if the water has reached the root zone. Good luck!
Thank you so very much Ruby! Very helpful!
Thanks for sharing your experiences.
Please, how to you address beetles?
This is our first year of having strawberries and raspberries and two kinds of beetles are all over them…Hi Kerstin
You’re welcome! I haven’t had any issues with beetles on berries. I do see a few different kinds on them, but the don’t seem to be damaging anything or destroying my harvest. So in order to give you accurate disgnosis and treatment I’d need pictures of the beetles in question and the damage you’re seeing. That said I can offer a couple resources. #1 A book, “What’s Wrong With My Fruit Garden” can help identify and offer organic treatments. #2 You might also find your bug and solutions at UC Davis Integrated Pest Management https://ipm.ucanr.edu/home-and-landscape/#gsc.tab=0 Lastly, making sure your berries are getting plenty of water and good nutrition in the form of organic compost or manure will make them vigorous and better able to fight off pests and pathogens.





Share Your Thoughts