
Table of Contents
How to Start Perennial Seeds
Perennial seeds can be trickier to germinate than common garden seeds, but don’t worry, we’ve got you covered! This article offers a primer for starting perennial seeds.
Some perennial seeds want to…
- Be digested by birds or mammals before they germinate.
- Go through winter to safely germinate in spring.
- Lie dormant in the soil for many years before germinating.
- Germinate after a forest or prairie fire when the soil and sunlight are more open.
Perennial seeds are very smart and they are always waiting for the best conditions to germinate. Unlike humans, many perennial seeds are very patient and may wait years or even decades to germinate.
We impatient gardeners have two primary ways of emulating the conditions many perennial seeds need to germinate: Scarifying and Cold Stratifying. Let’s go!
Table of Contents
Scarify Seeds
When we scarify perennial seeds, we are breaking, dissolving or abrading the outer seed coat, so that the seed can finally absorb water. This helps me remember the term:
We give a scar to the seeds when we scarify them.
Perennial seeds often have a hard seed coat. A hard seed coat helps perennial seeds prevent germination until the time is right. Every species will differ with regards to how thick their seed coat is.
After a seed coat is worn down, seeds also have genetic tools that allow them to gauge the external conditions, such as water, light and temperature, just like annual garden seeds.
- Acid. Stomach acid of birds or mammals, and/or fermentation.
- Friction & Cracking. Such as erosion or animal hooves.
- Time. Time spent in the soil seed bank moistening and drying in cycles.
- Fire. Heat and smoke from forest or prairie fires.
Smart gardeners have found ways to emulate each of these conditions. I am primarily focusing on friction and cracking because those are my go-to tool for scarifying perennial seeds.
How to Scarify Seeds
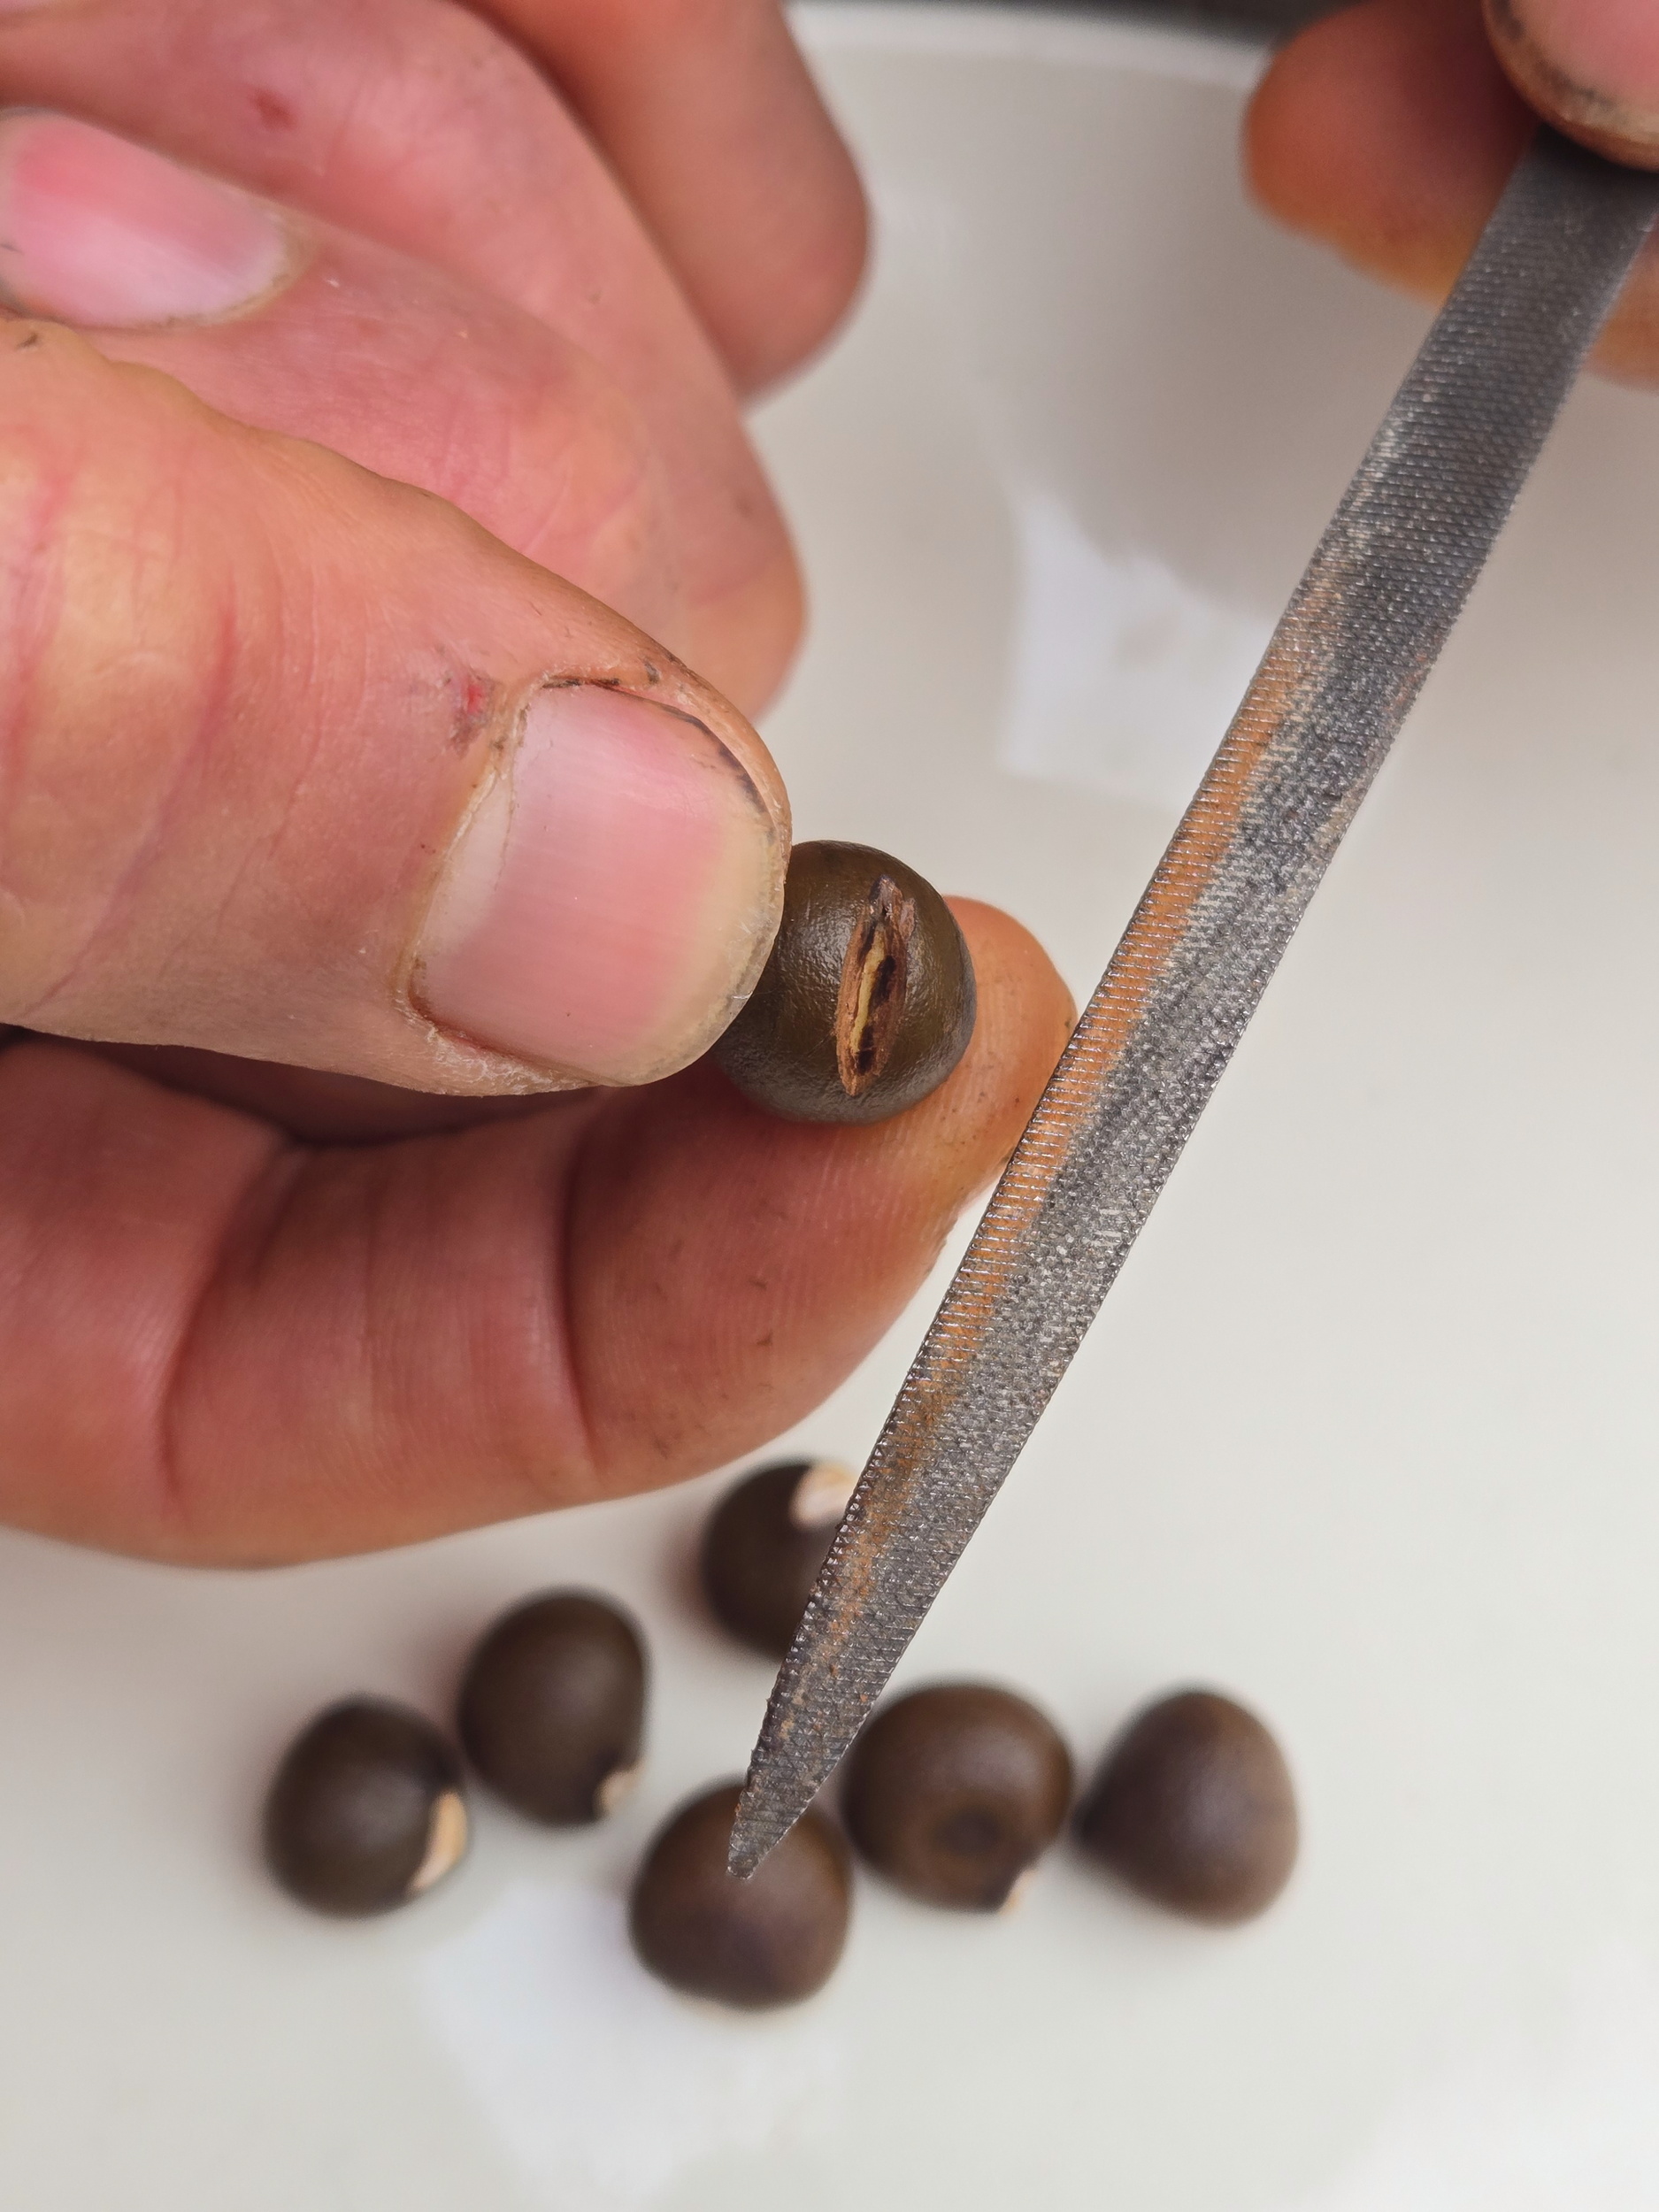
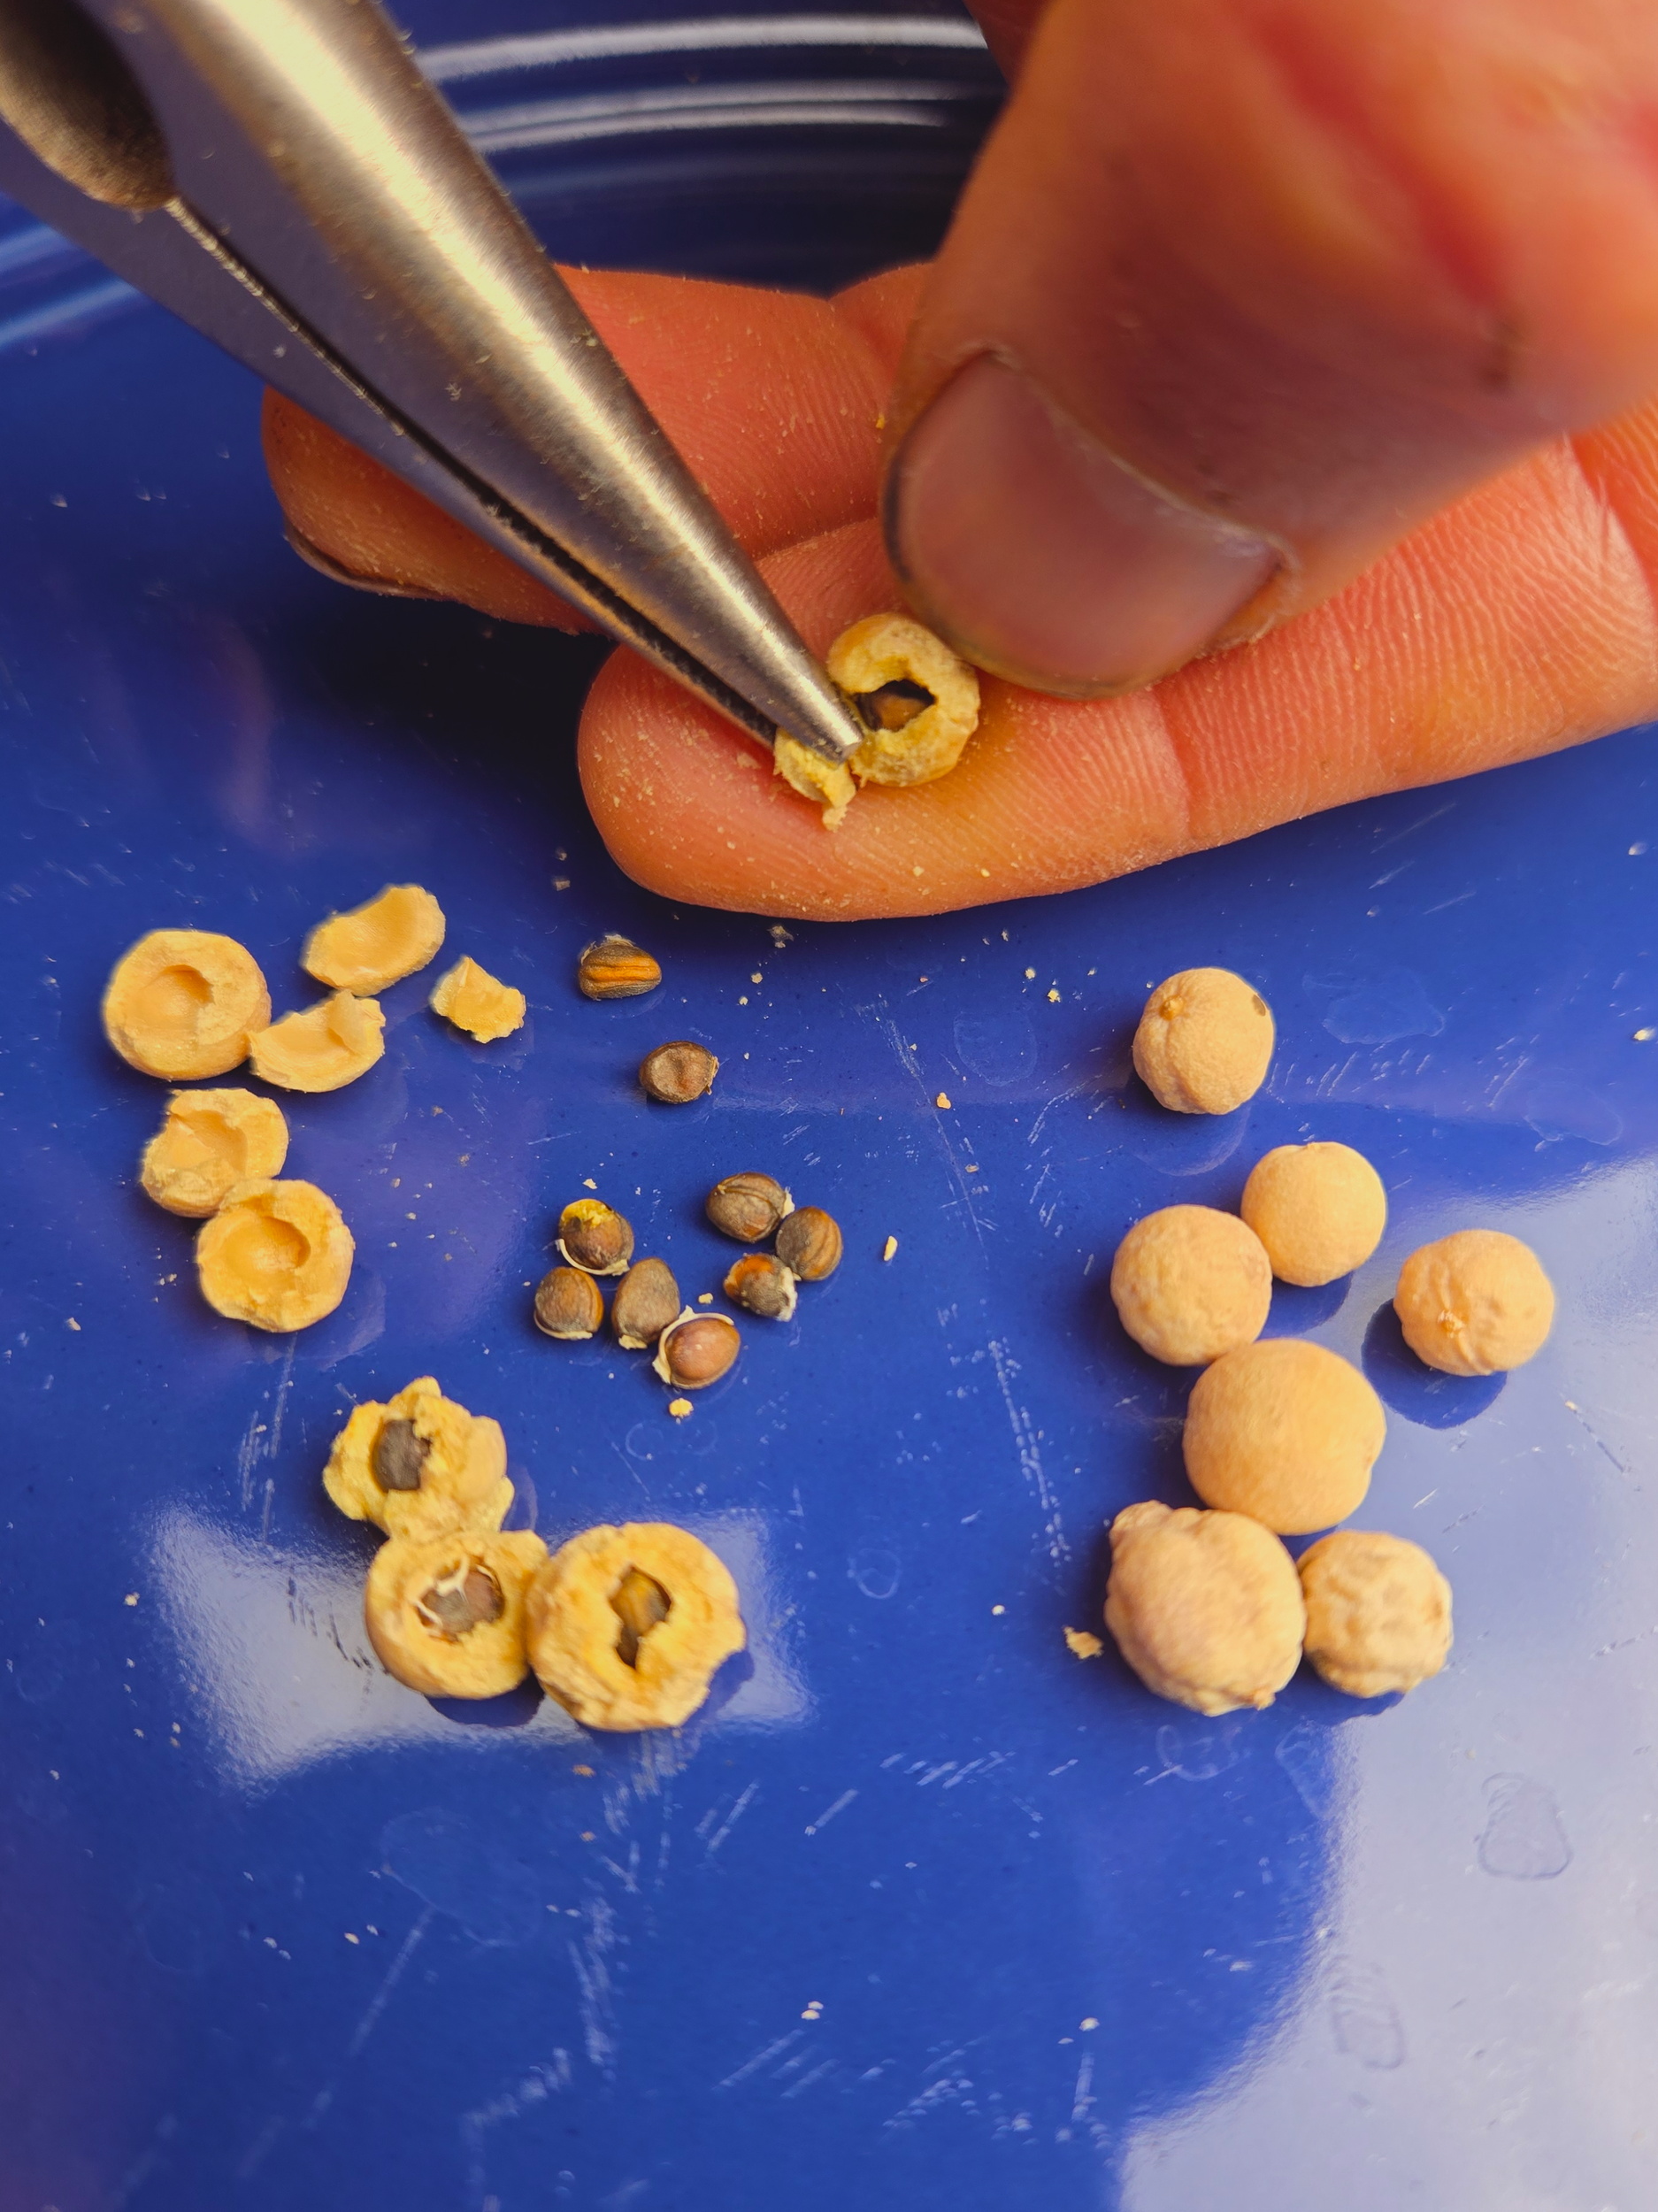
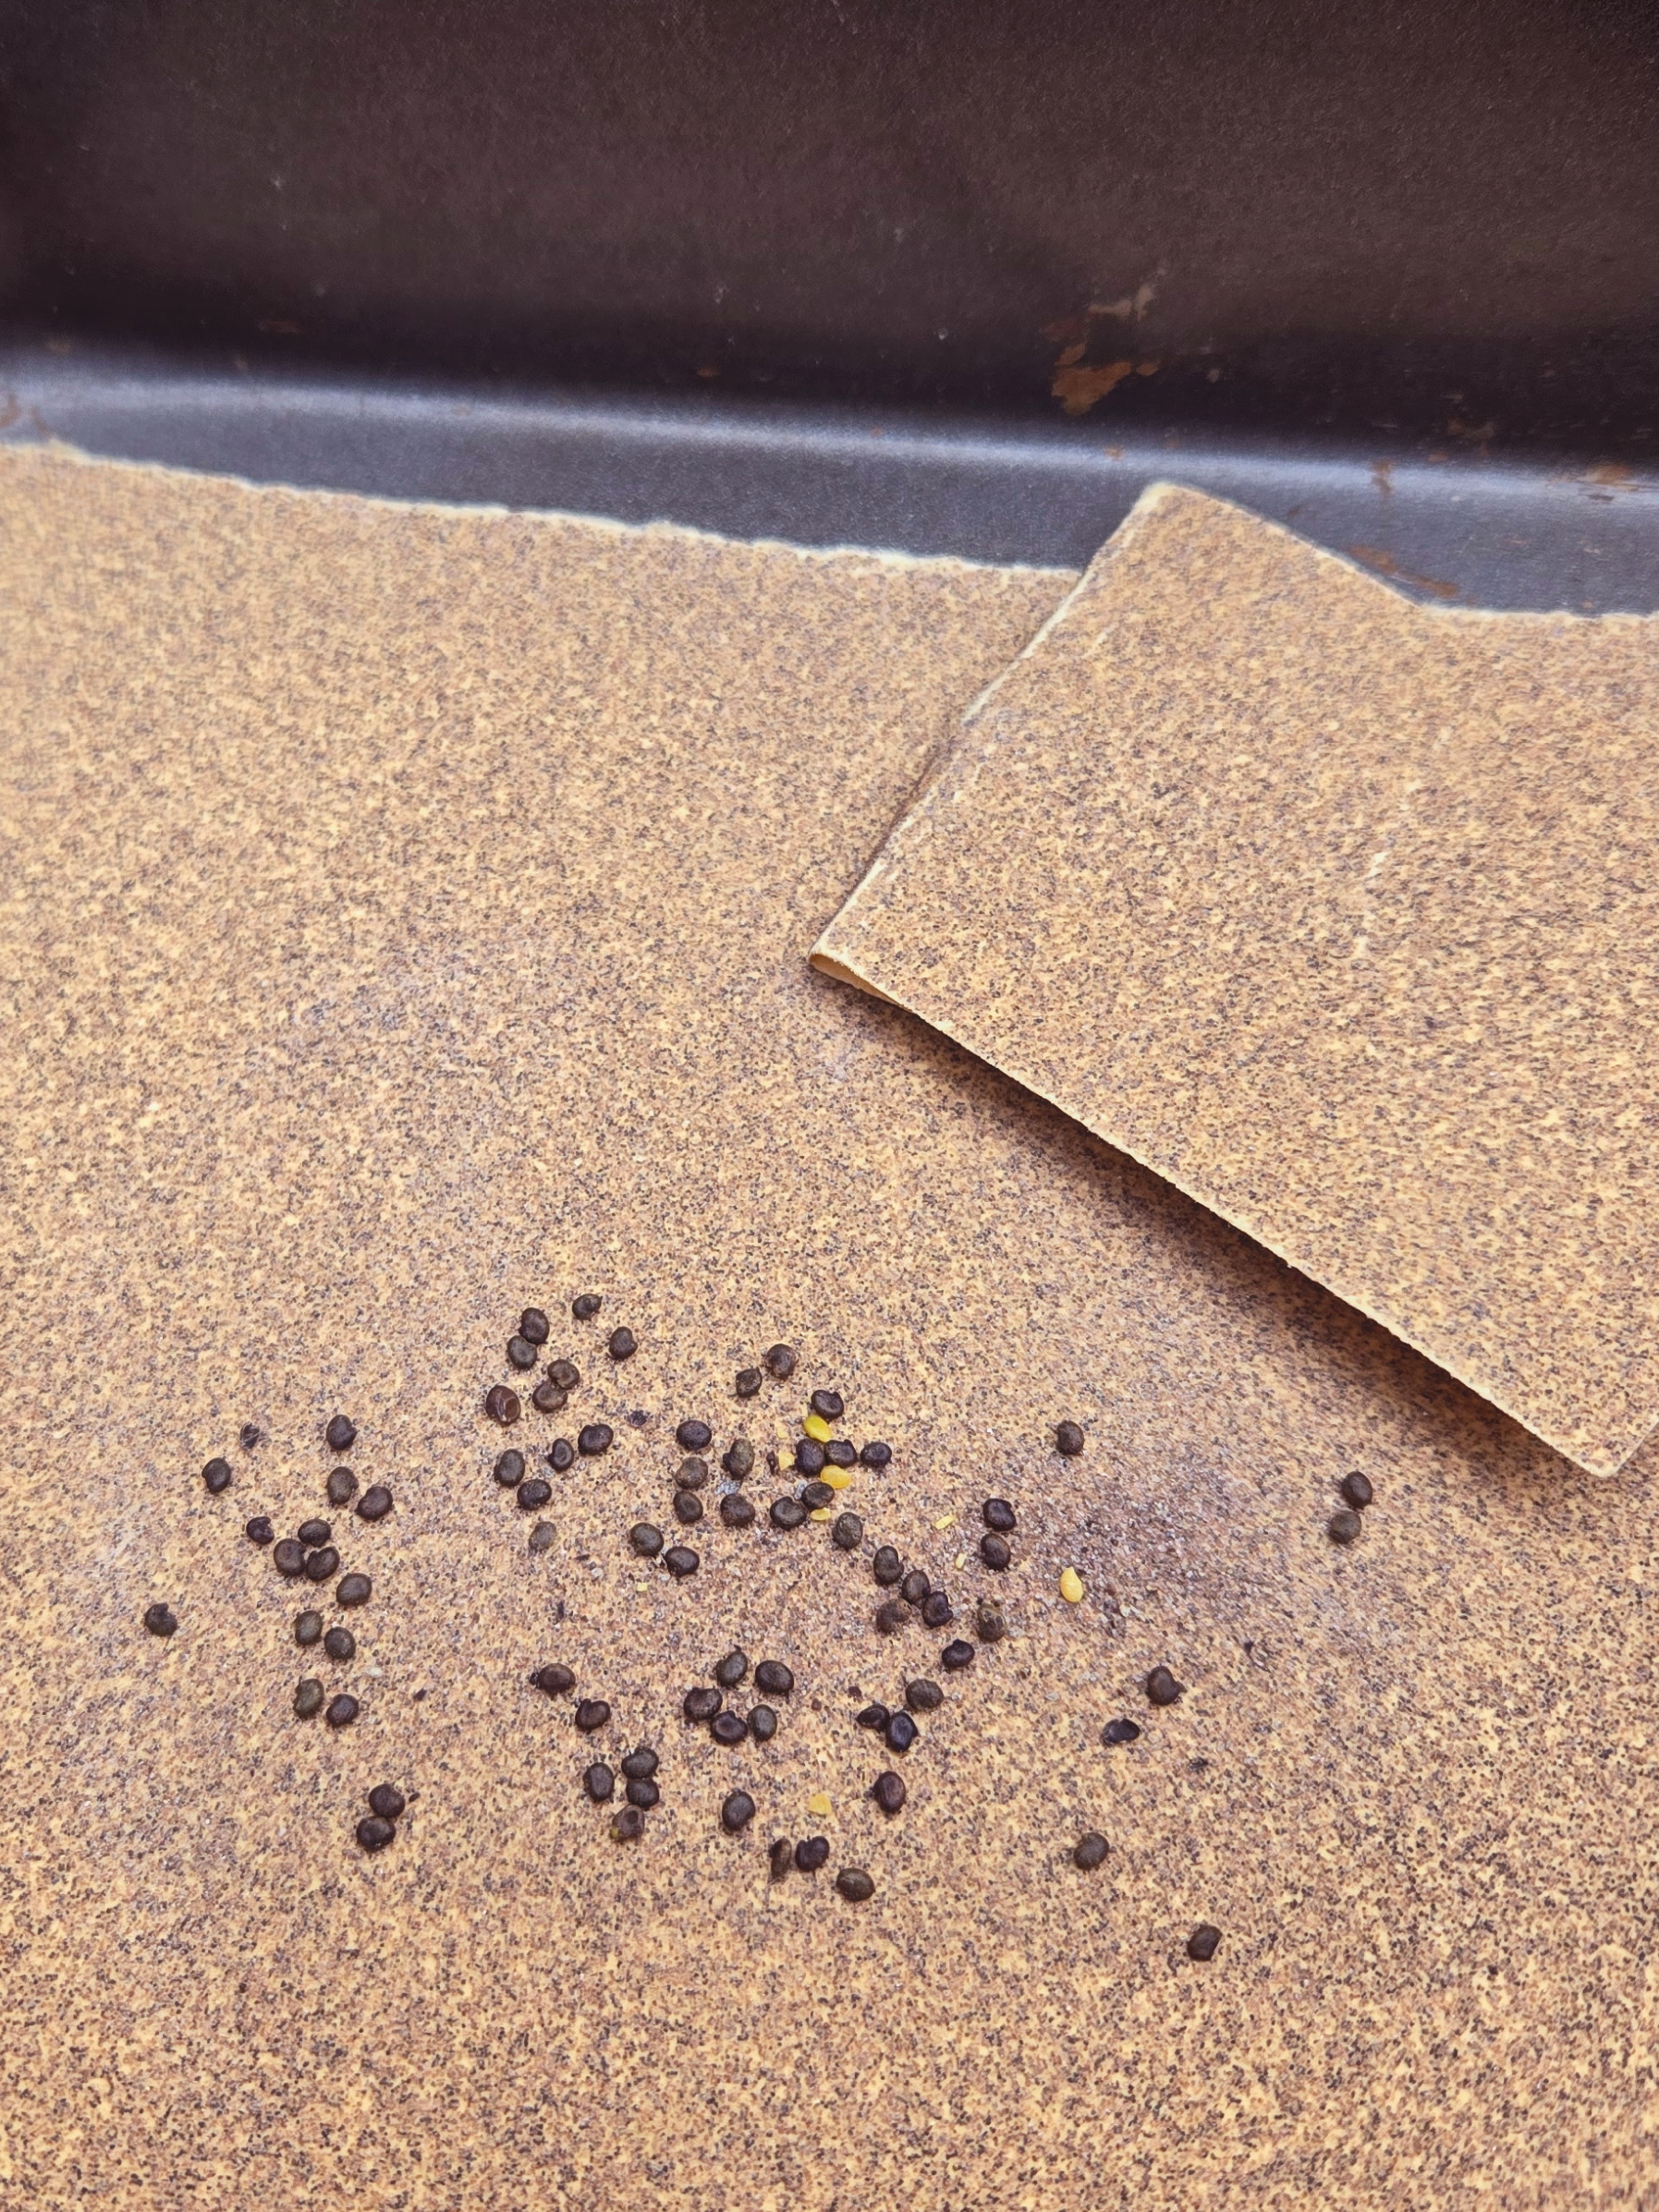
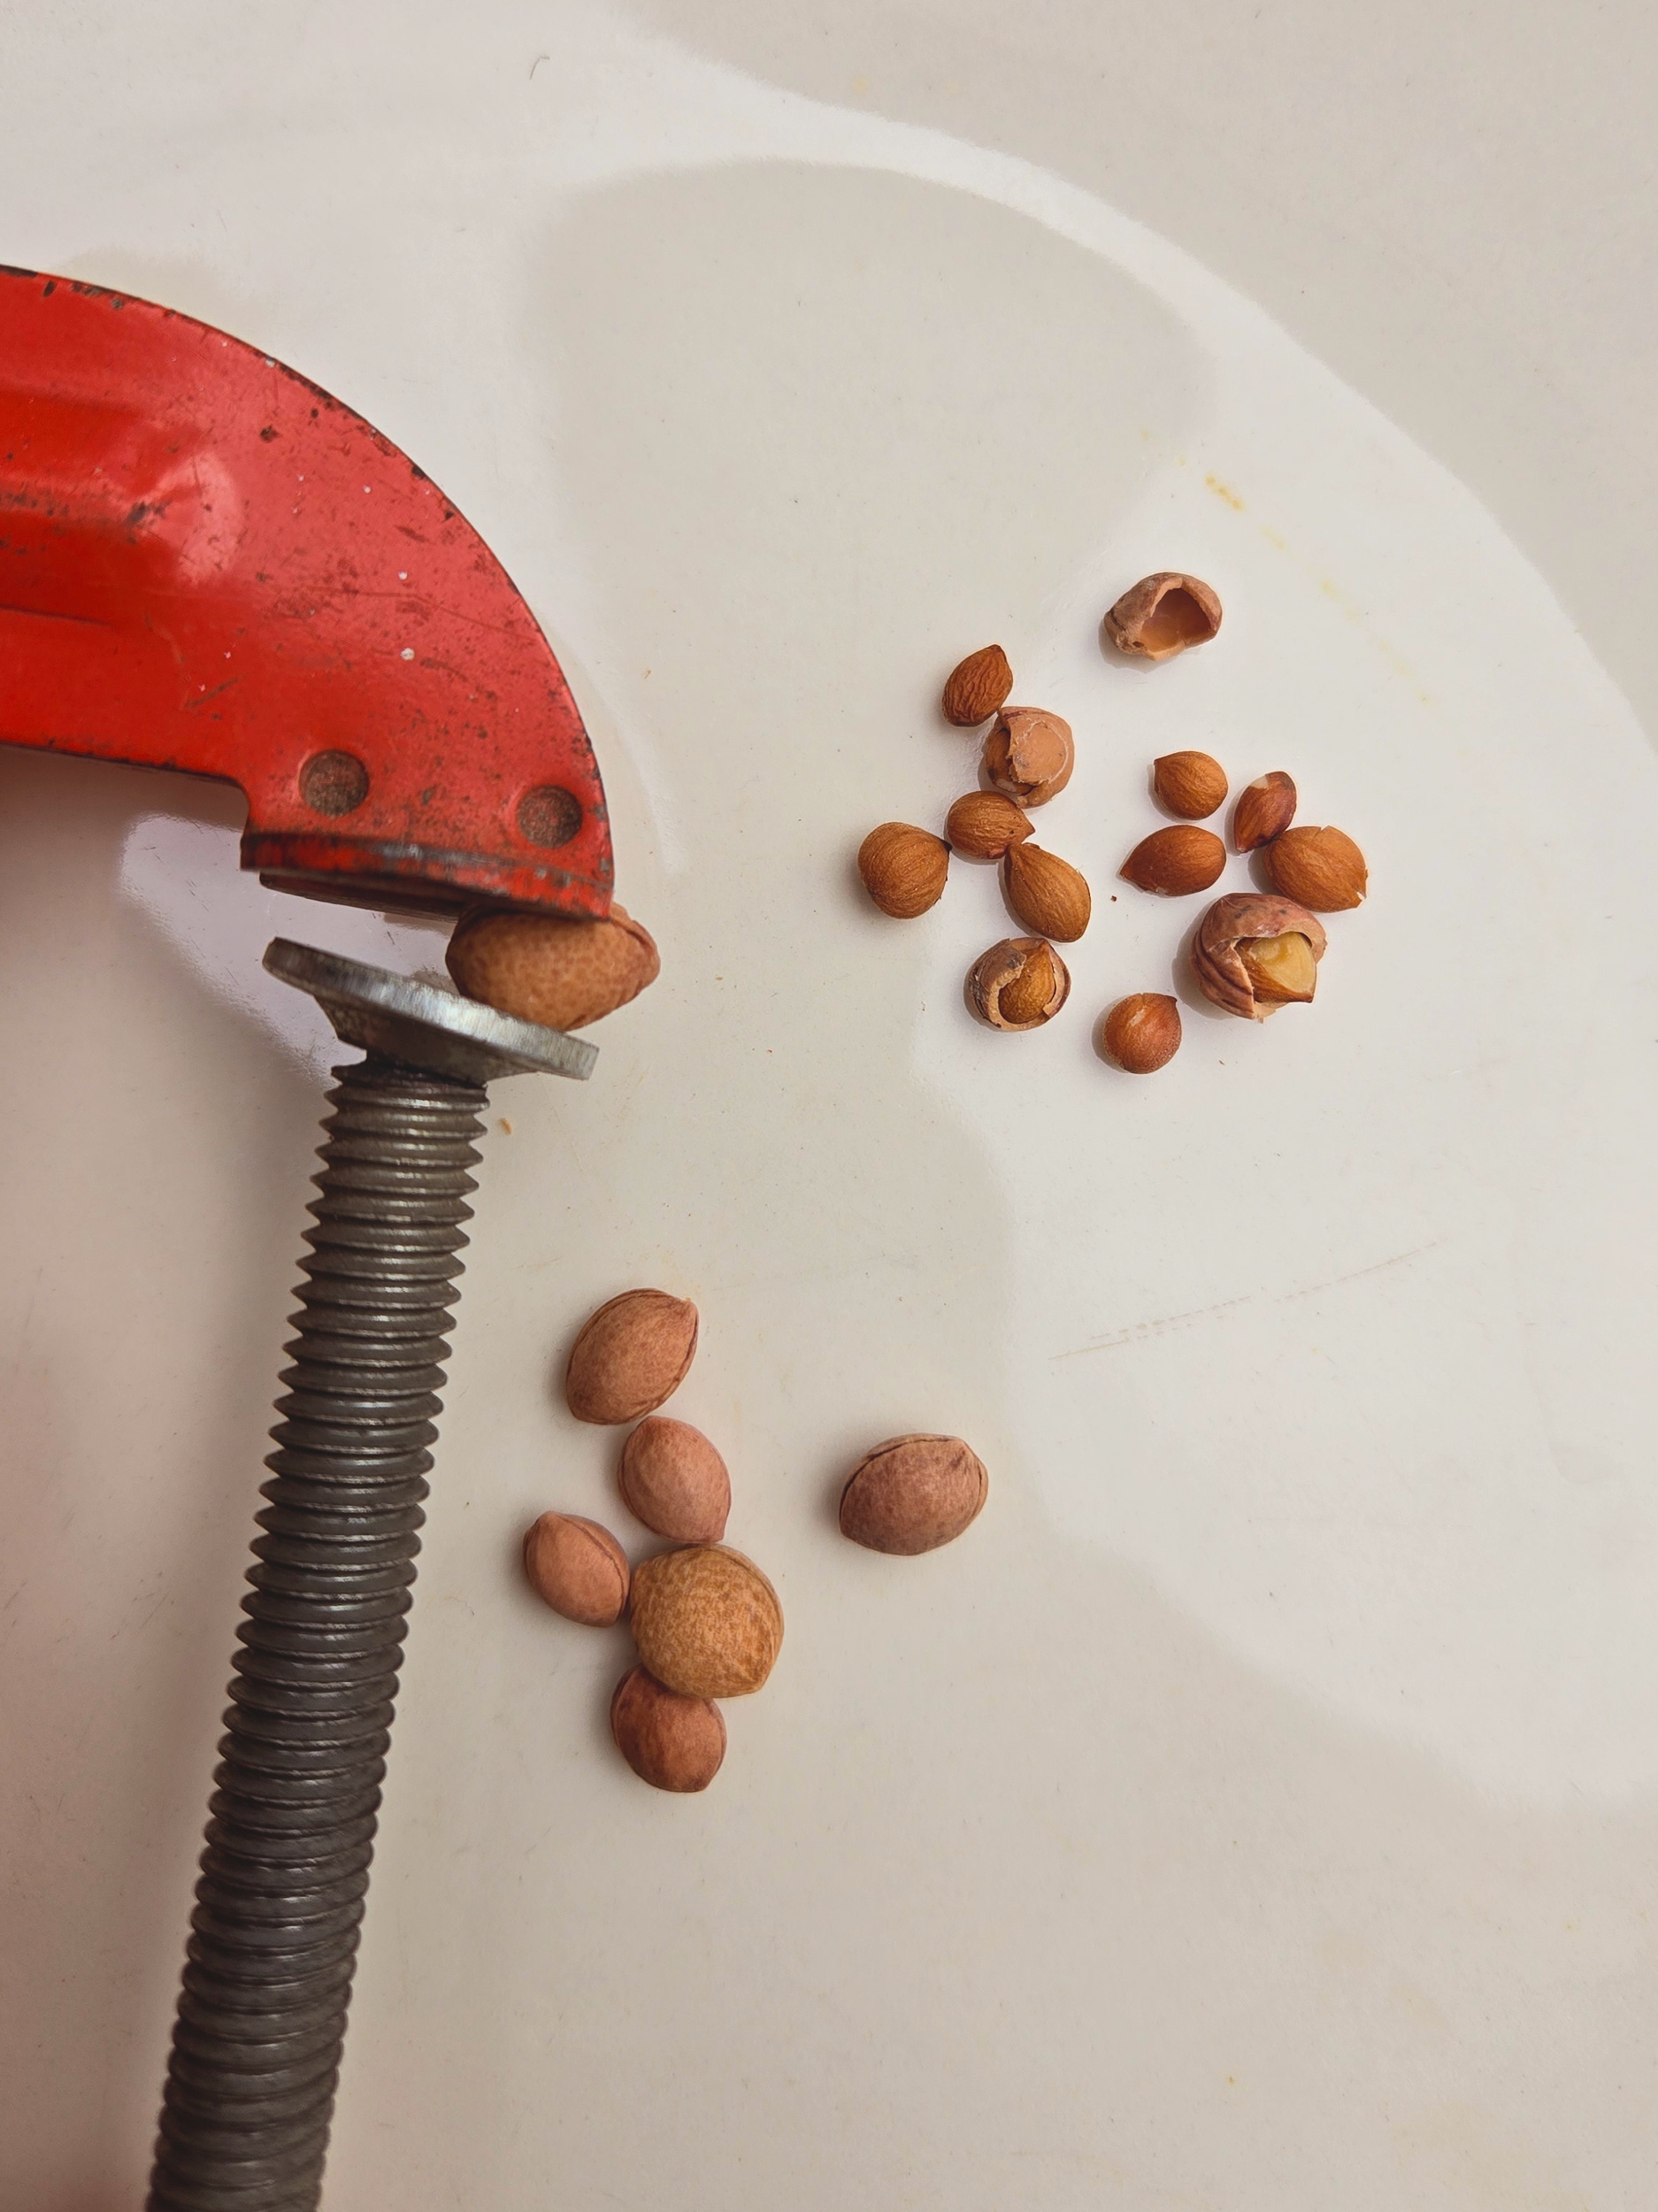
My favorite tool for scarifying seeds is a small triangle file, but I sometimes use sandpaper, fingernail clippers or even needle-nose pliers, depending on the seed.
When we sand or file the seed, we want to abrade the seed coat just enough that moisture can penetrate the seed, but not too much because we don’t want to damage the inner seed (embryo and cotyledons). Every kind of seed has a different seed coat thickness, so we need to be observant and receptive to the seed.
I usually start filing a little bit at a time and then look at the groove I created with my file. I’m looking for a color change. If it feels like I am still filing the seed coat, I’ll keep going a little more and check again. If I see the seed coat start to change color, or if I see a definite color change and it looks like I’ve hit the edge of the seed, I stop filing immediately and scarify the next seed.
Once you do a few seeds you get a feel for it and can go faster. But if you start scarifying another kind of seed, you need to start over and slow down to observe, because the seed coat might be thinner or thicker.

Cold Stratify Seeds
When we cold stratify perennial seeds, we are giving the seeds moist and cold conditions for a period of time. Many perennial seeds want to sprout in the spring, after winter has passed, to avoid danger of freezing before they get big and strong enough.
So we are emulating winter conditions for our seeds, so that they know its safe to come out of dormancy. Cold stratifying perennial seeds is also referred to simply as stratifying, or seeds requiring a period of moist-cold stratification.
The latter is a mouthful, but it’s also the most informative because we are concerned with time, moisture and temperature.
Time. When you read seed starting instructions, look for the period of time that a seed needs to stratify for. Often perennial seeds need to cold stratify for somewhere in the 60-90 days time-frame, roughly the duration of a winter season. Some seeds need less time, in the 1 to 4 week range, and others need more.
Moisture. Your seeds need to remain moist throughout the stratification period. We want seeds to have absorbed water and stay moist. But we don’t want them dripping wet or in standing water.
Temperature. Ideal temperature for stratifying seeds is just above freezing, in the 34-39 F range. Freezing is OK for some seeds, but can damage others. Your mileage may vary depending how cold the freezing temperatures get. Most guides say to avoid freezing seeds for the full duration of the cold stratification period. However, seeds freeze in nature and some freeze/thaw events throughout winter can help to soften the seed coat.
Below you’ll find basic instructions to cold stratify perennial seeds. If you want to dive deeper and learn more, you can read our in-depth article: How to Cold Stratify Seeds
How to Cold Stratify Seeds
Here are two basic methods to cold stratify perennial seeds:
Cold Stratify Method #1 – Fridge
The fridge (not freezer) is an ideal for cold stratifying perennial seeds if 1) your climate doesn’t get cold enough in winter, 2) you want to stratify seeds outside of winter, or 3) you want a controlled environment.
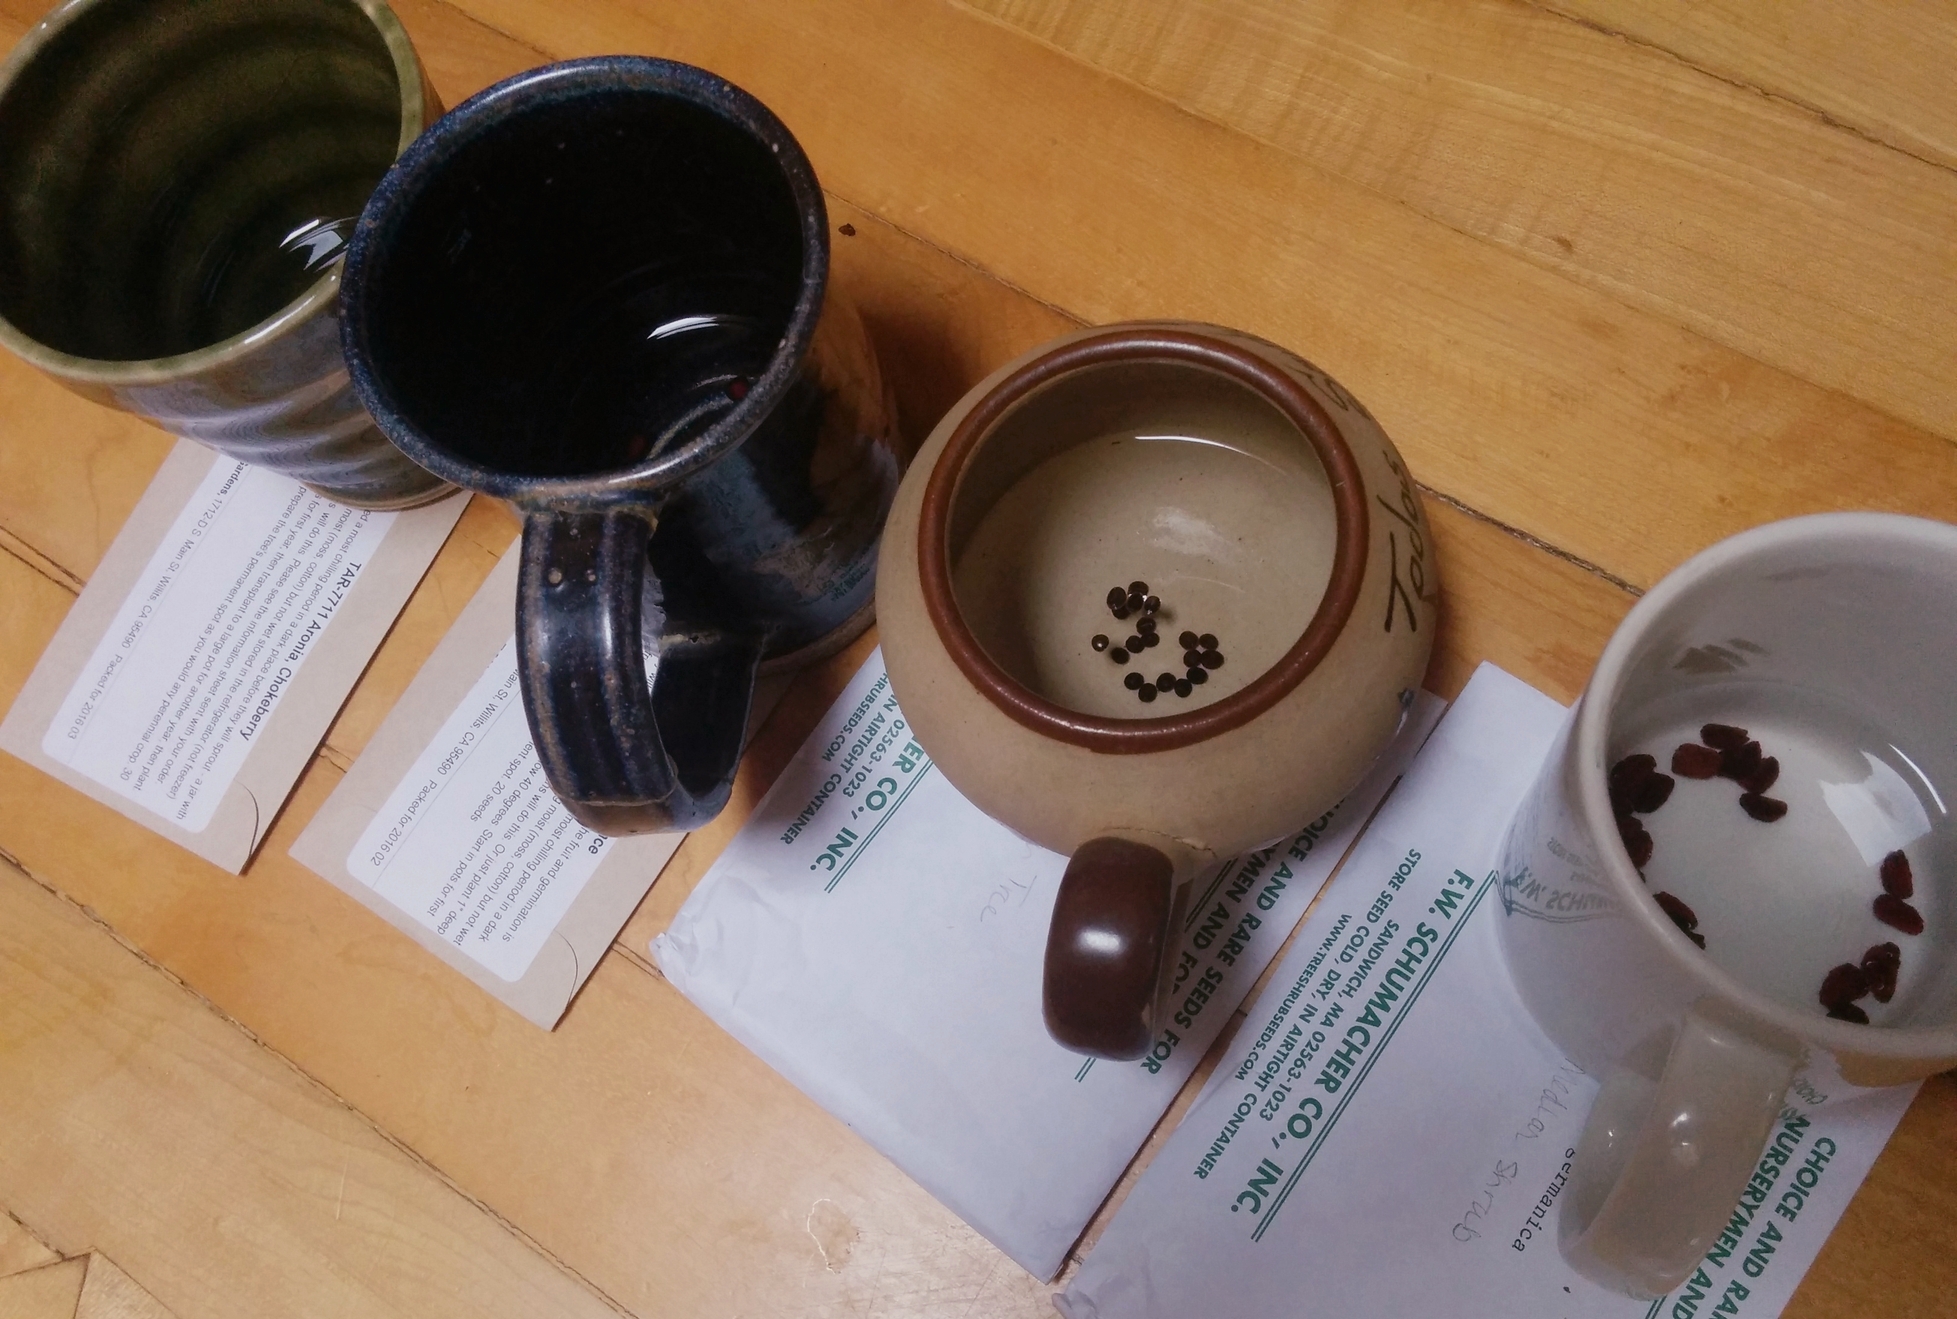
To stratify your seeds in the fridge, first soak them for 24 hours in warm / room temperature water. This gives the seeds a chance to moisten, and absorb water if they can.
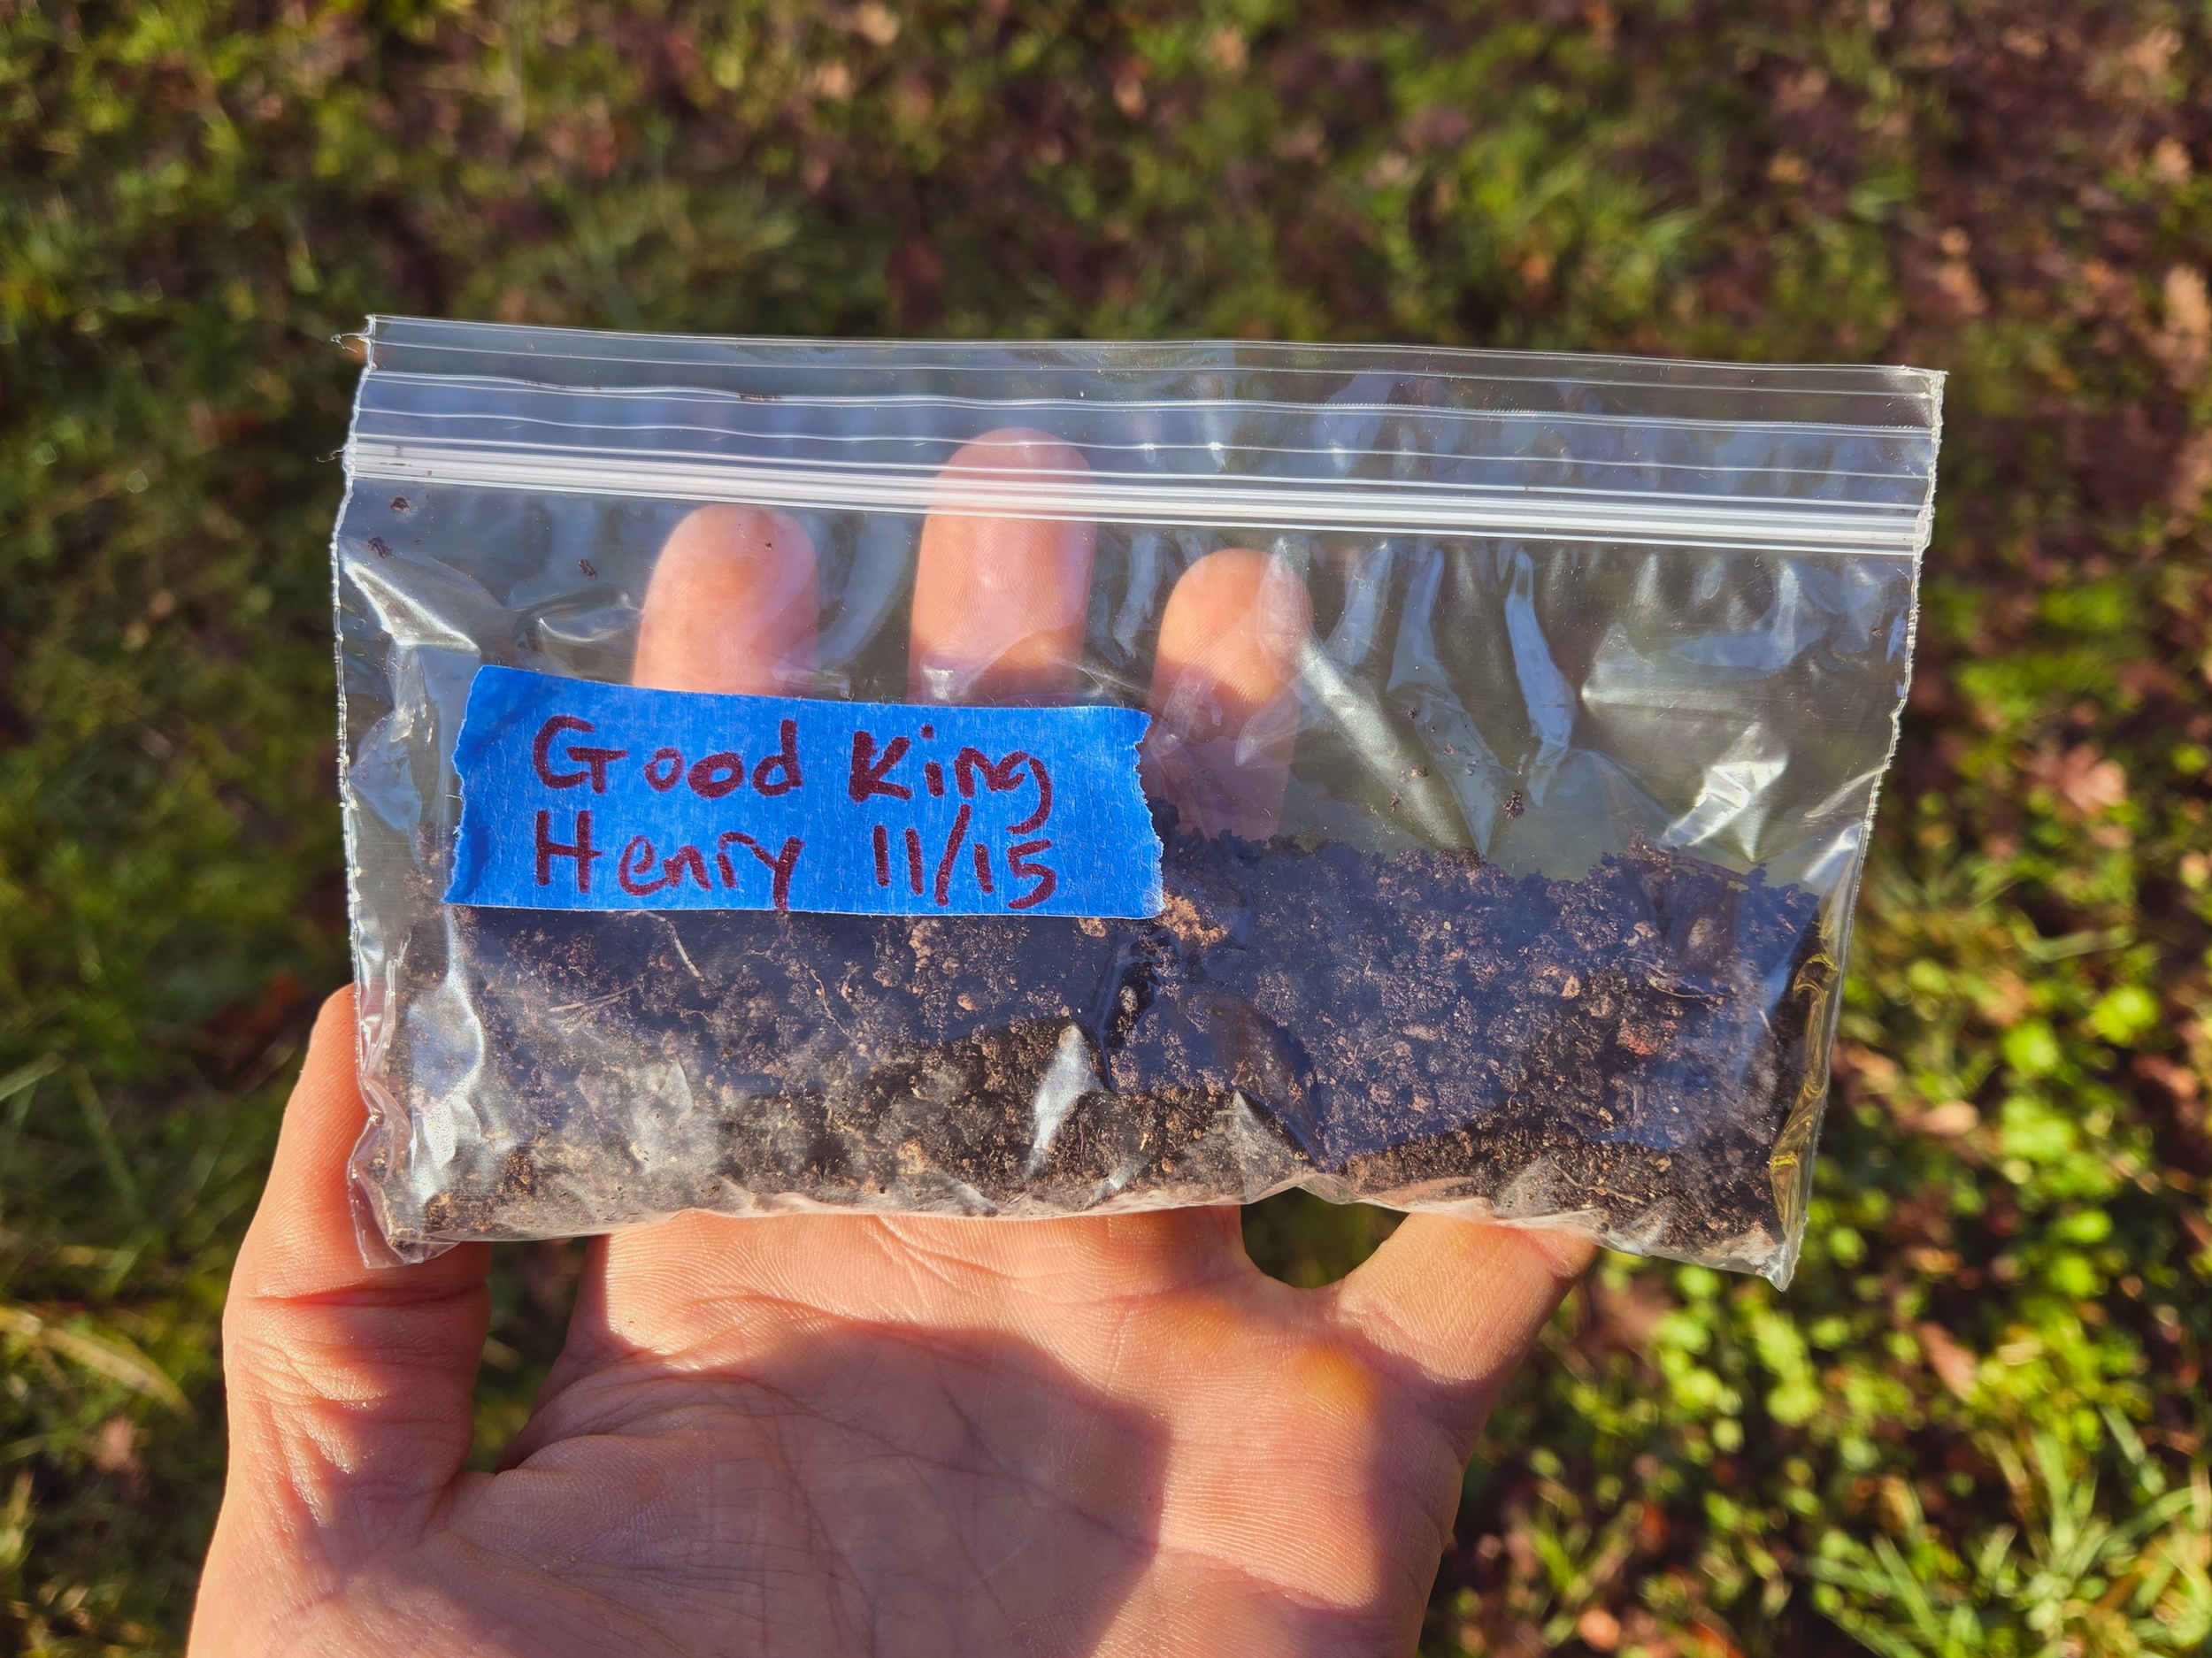
Then gather a small amount of potting soil. Some people like to prepare a mixture of half potting soil and half sand, perlite or vermiculite. Truth be told, just about any medium can be used, such as straight sand or straight coconut coir. You could also use homemade compost if it is well composted and crumbly. My potting soil already has some vermiculite, is well draining and I find it works well without any additions.
If it’s dry, add a small amount of water to the mixture so that it is only just barely moist. You don’t want dripping water or saturated / soggy soil. If you squeeze it firmly with your hand, no drops should come out. If even a little water pools at the bottom of the bag, or in the corner, start over (or drain it out as much as you can without losing seeds).
Add your seeds to the soil medium in a ziploc bag, making sure that the seeds are all covered by the soil. Don’t let seeds touch the sides of the bag or you risk them molding. You don’t want too much soil in the bag. Just enough to cover the seeds on all sides, especially with small and tiny seeds. With larger seeds, this is less of an issue.
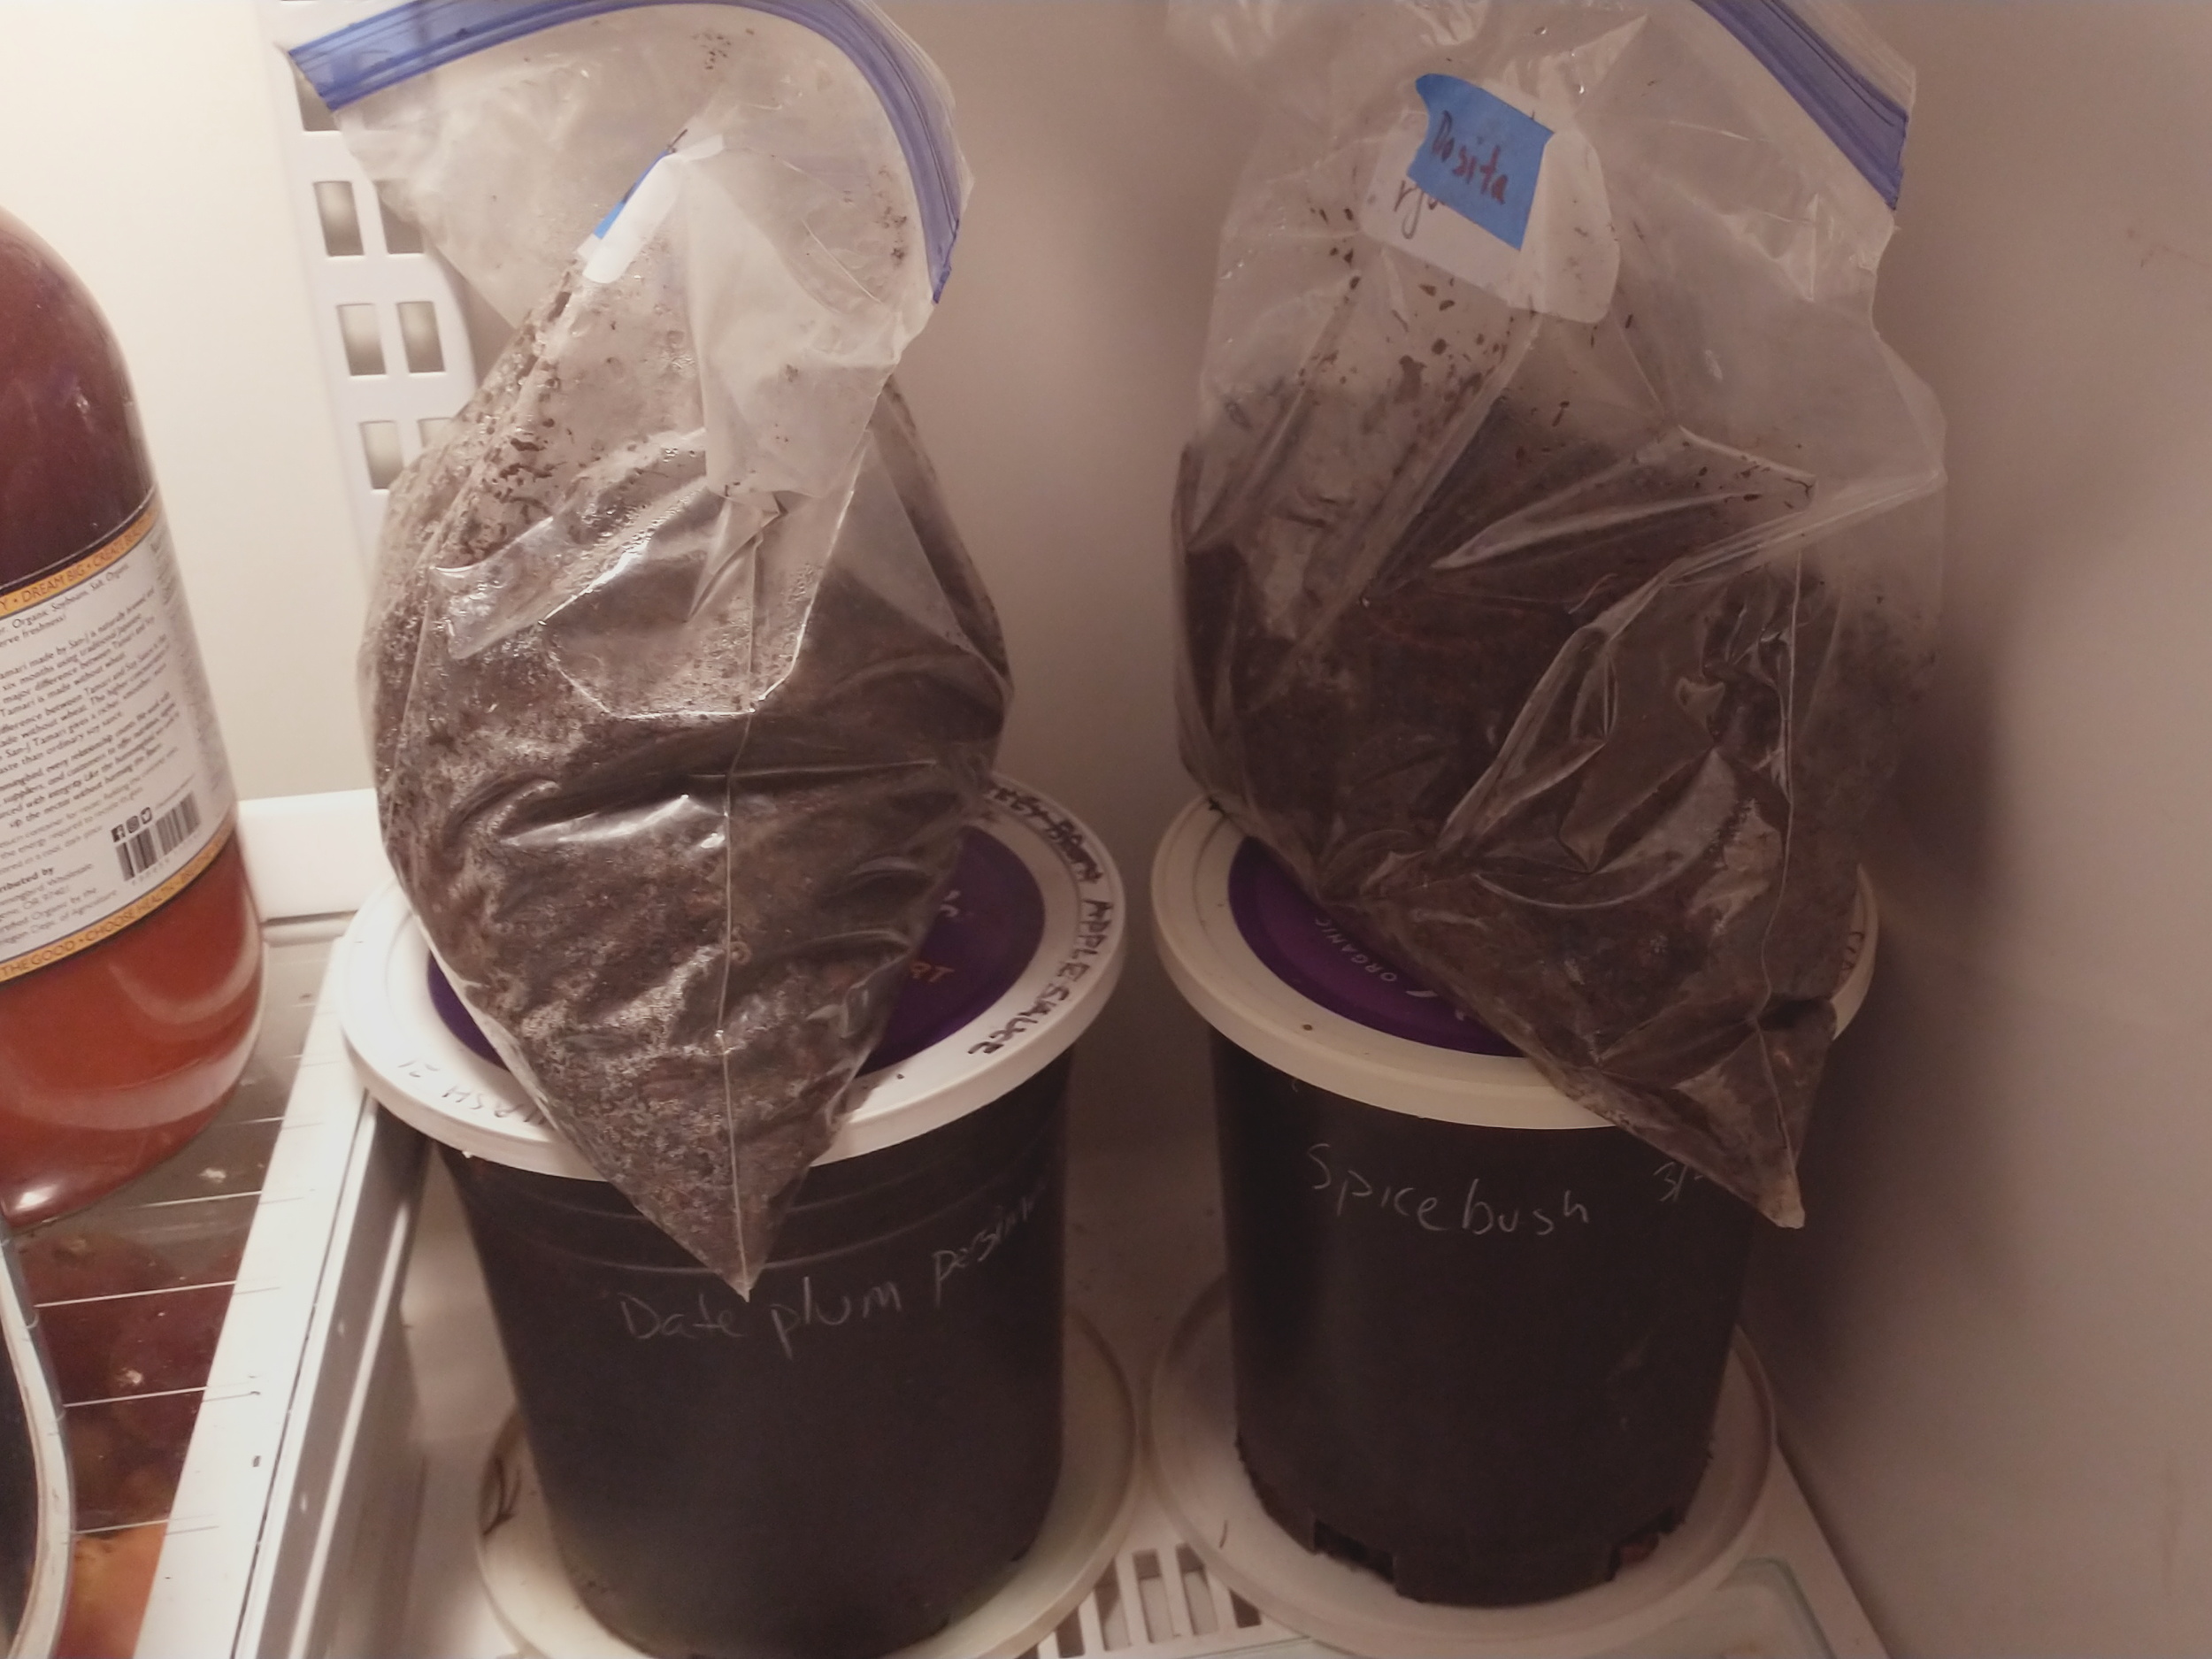
Place the bag of seeds and soil into your refrigerator. Set a calendar reminder to pull out the seeds after the required cold stratification time period is up. Then take the seeds out and plant them into a pot pre-filled with potting soil, by spreading the soil/seed mixture out evenly on top. Some seeds may need an extra thin layer of soil on top, but if your seeds require light to germinate, avoid that step.
Note: When stratifying seeds in the fridge you need to check on the seeds periodically to keep an eye out for mold and germination. If the seeds are starting to mold, take them out and rinse them and start over. If the seeds are starting to germinate, take them out of the fridge immediately and pot them up to start growing.
Cold Stratify Method #2 – Outdoors
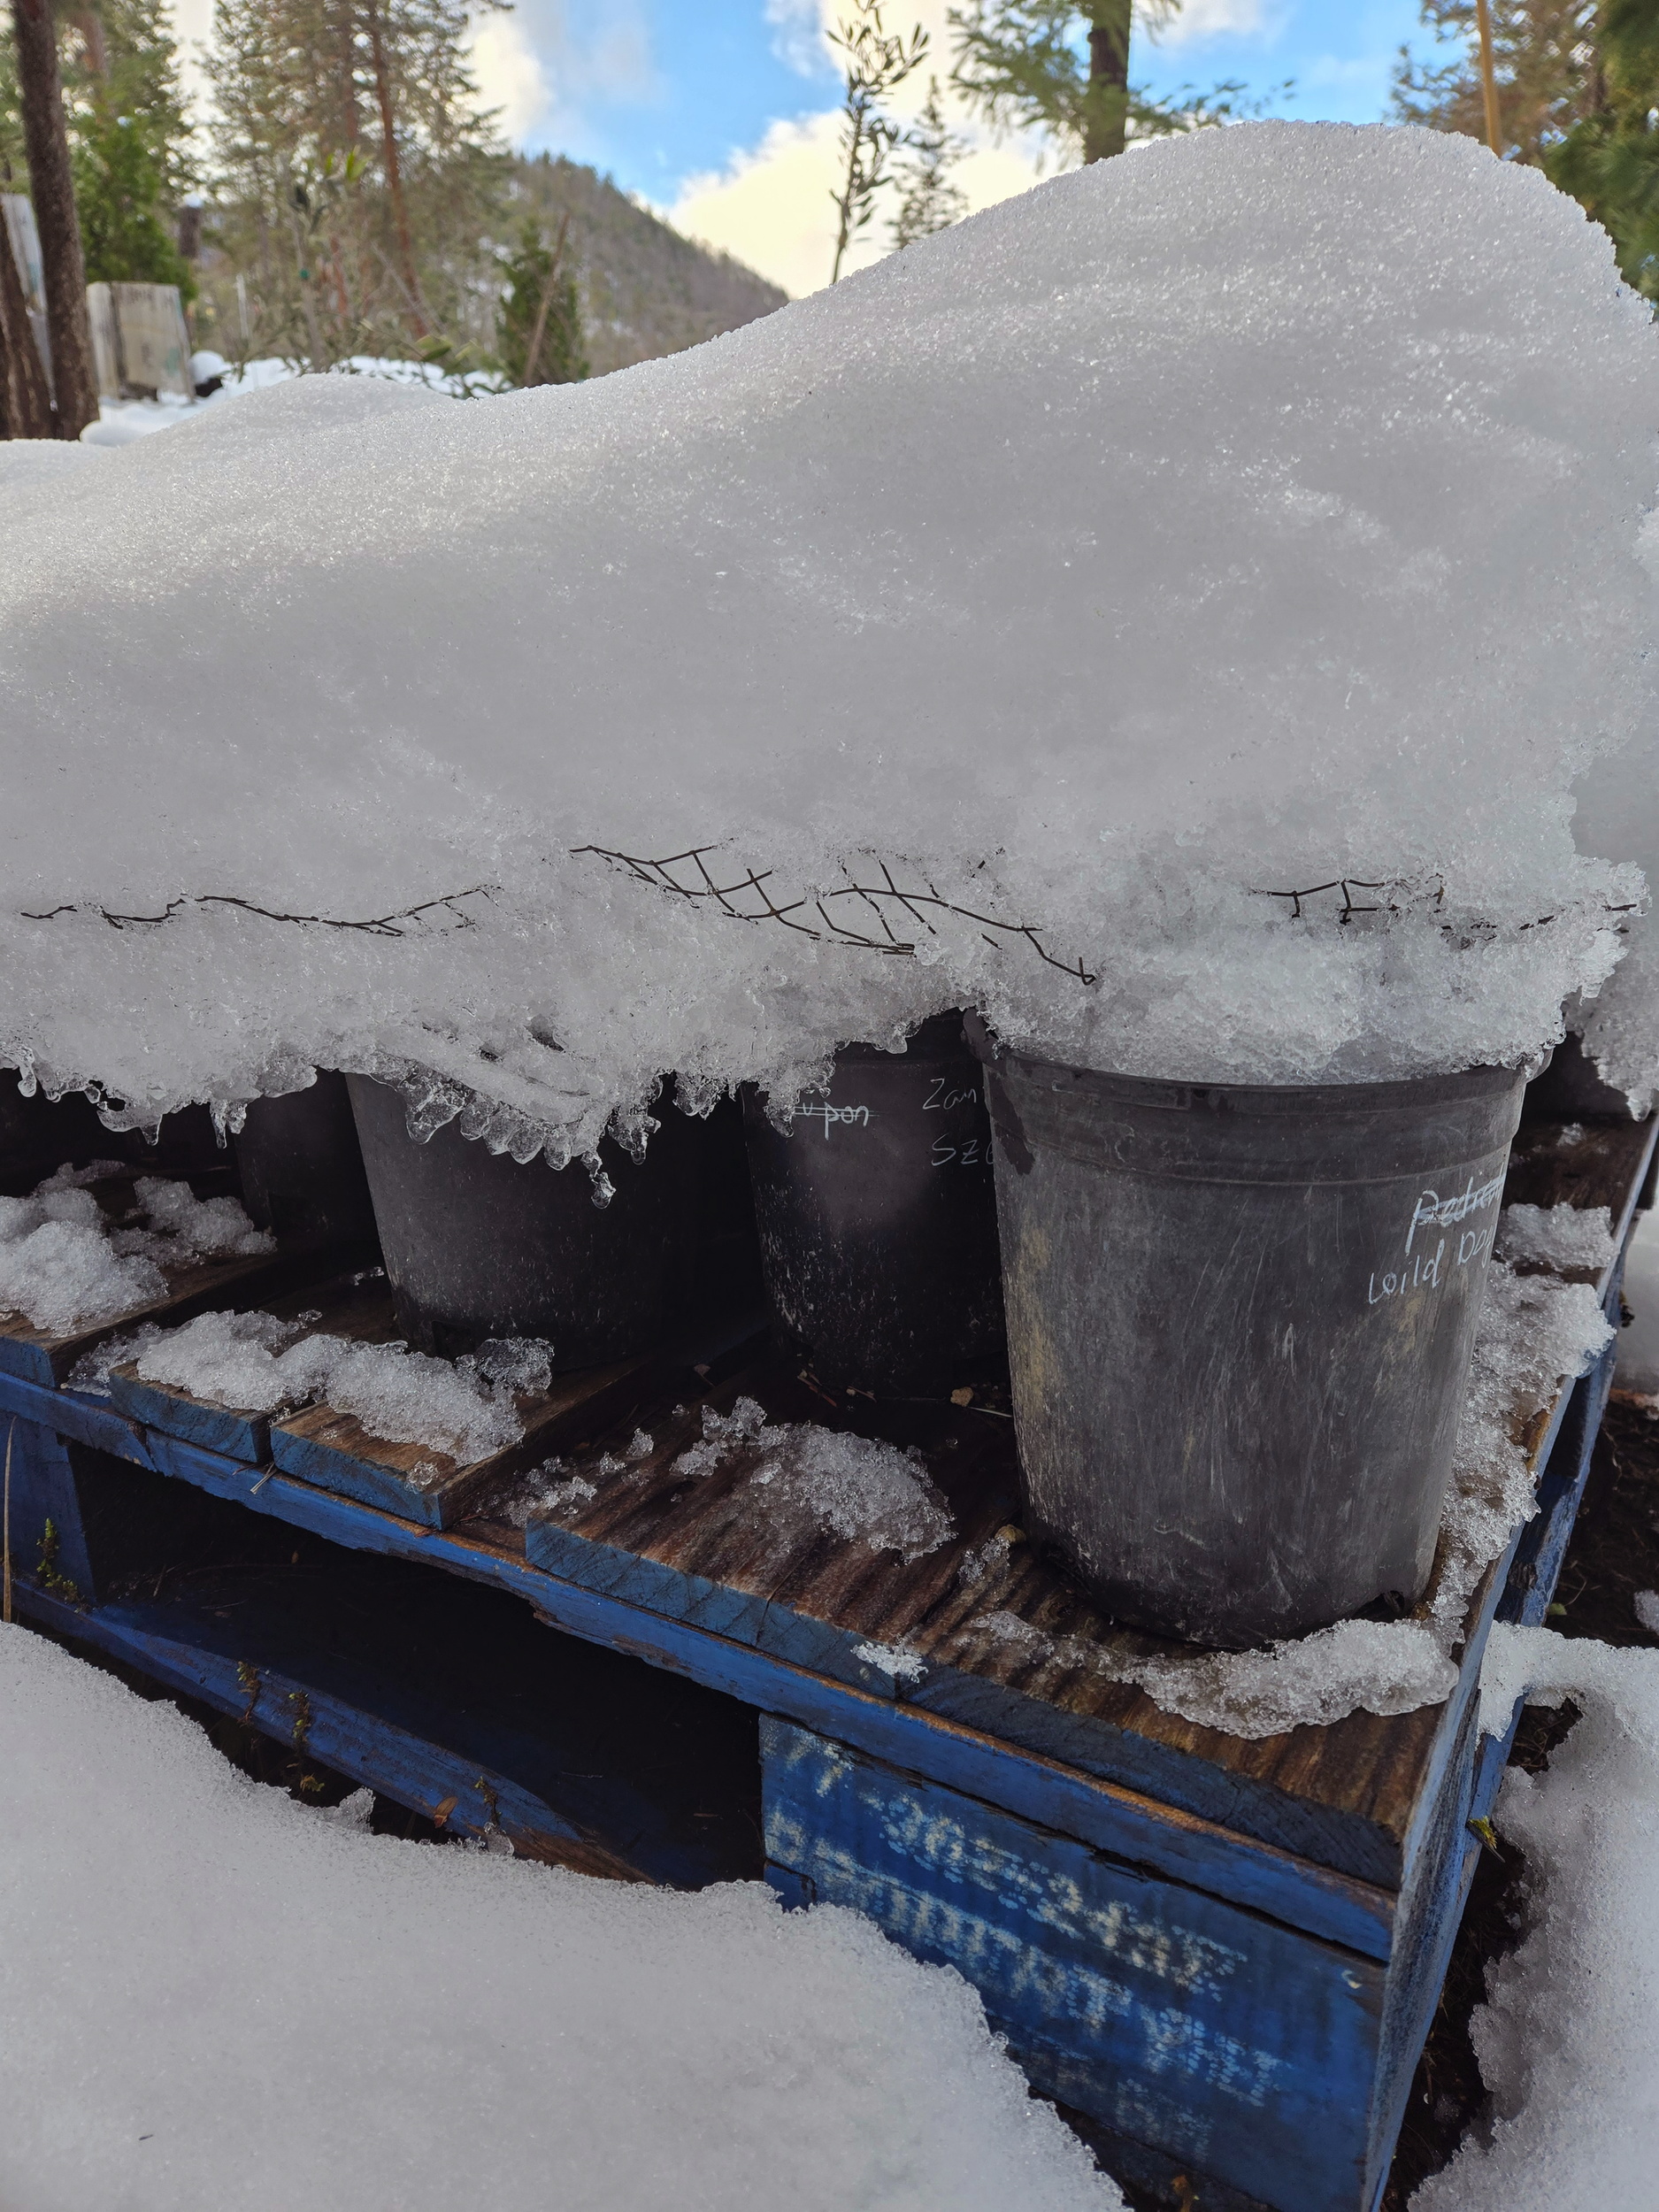
You can use this outdoor method if you live in a climate that gets cold winters that regularly frost and/or freeze in the winter.
In the fall or early winter, plant your seeds in a nursery pot filled with potting soil. I like to do this October through December in our climate. Pay attention to sowing depth based on the requirements of each species.
Thoroughly water the pot with a fine shower of water (so as not to disturb the soil surface) if rains are not expected in the near future.
Place your pot outdoors to go through the natural cycles of winter. Protect from rodents if necessary.
When conditions are not cold and moist outside, such as during the fall, spring and summer, you’ll need to make sure to keep your pots regularly moist until the seeds germinate.
Note: If you live in a very cold climate that goes far below freezing and doesn’t have reliable snow cover through winter, you will want to give your seeds some extra protection from extreme cold temperatures, like placing them in a garage, greenhouse, coldframe or some other way of moderating the temperature to risk damaging some seeds that may be more fragile, with regards to low temperatures.
If you want to dive deeper and learn more, you can read our in-depth article: How to Cold Stratify Seeds
Final Tidbits of Knowledge
In this article, I’ve given you general recipes for scarifying and cold stratifying perennial seeds. You can follow them and have pretty good results with most perennial seeds that require scarifying or stratifying.
Many, but not all perennial seed vendors will indicate what pre-treatment a perennial seed needs to germinate. Some perennial seeds need only scarifying or cold stratifying, others need both.
However, please know that some perennial seeds are more picky than others, with how you scarify and/or stratify them. For example, Blue Elderberry is one of the more challenging seeds that we offer. When a seed in our catalog is more picky to germinate, we say so and offer our best guidance.
In our seed catalog, we put extra care in writing seed starting instructions. Most of the seeds we offer are relatively straight forward to germinate with the stratifying and scarifying instructions we’ve provided above.
One final bit of advise I will offer is this: If your seeds don’t germinate in their first season, don’t give up on them. Sometimes perennial seeds will germinate after going through one or two additional winters. You can leave your pots outside or give them additional stratification periods in your refrigerator.
If seeds don’t germinate in their first season, I will sometimes keep them in their pots for up to 2-3, or more years. Some of them do end up germinating after a few seasons. Time and moisture can help break down seed coats and signal to the seeds that its time to germinate.
Some seeds just naturally want to germinate later. We gardeners do the best we can to provide the conditions that perennial seeds need to germinate, and then we listen and see how the seeds respond. Gardening is a conversation.
Thank you for taking the time to read this article to the end. I hope you got some value! I am wishing you lots of joy with your seeds, plants and in your garden this season.
Recommended Reading
- How to Cold Stratify Seeds (In-depth Guide)
- Seeds of Diversity: 5 Reasons to Embrace Genetic Diversity in our Gardens
- When I Carried Seeds—They Grew Into Love
Free Seed Saving Crash Course
Up your seed saving game in our free video: Seed Saving Made Simple We designed this presentation to help you have confidence knowing how to save seeds from your garden.
Free Seed Resources
We’ve put together a collection of stories, education and inspiration around gardening, living and working with seeds. They are all free and openly available for you to read and explore. Enjoy!
4 responses to “How to Start Perennial Seeds”

This article is super helpful. Thanks for taking the time to explain cold stratifying.

You’re welcome Terry! I’m so glad you found this article helpful!
Hi Noel, one of my favorite perennials to start with moist stratification is columbine. I’ve had great success with them, and they are flourishing in the community garden! Thanks for this highly informative and helpful post!
Dana, Ooh columbine! Such a beautiful flower and we love how shade tolerant they are too! How nice to have columbine in the community garden. You’re welcome, I’m glad you found this article helpful!









Share Your Thoughts